
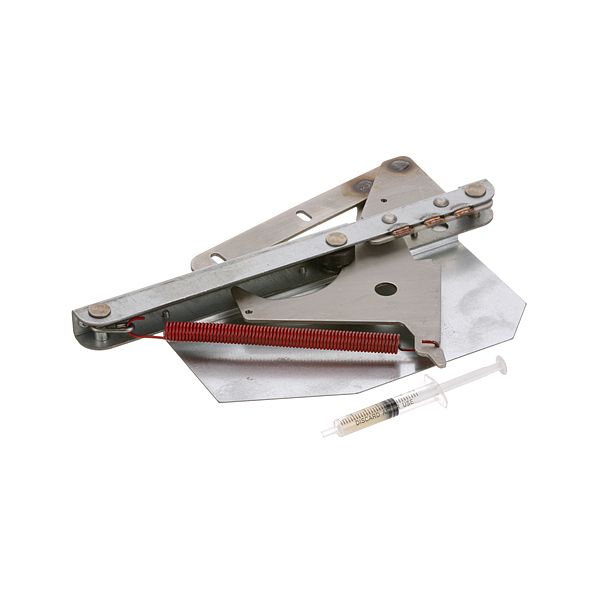
TurboChef I132201 Left Hinge Service Kit NGO-SOTA

Special Price $188.74 Regular Price $290.82
In stock
SKU
I132201
Manufacturer:

The TurboChef I132201 Left Hinge Service Kit NGO-SOTA includes the parts required to fix or replace the left-side hinge mechanism by matching the pivot points and attaching hardware to make the appliance door swing properly. It is mounted at the left hinge point of the front frame of the oven and is attached to the door assembly to allow the movement in a smooth way along the assigned pivot. The service kit is placed on the left side of the cavity opening and is attached to the cabinet and door where the original was placed.

Dimensions

  • Length: 1 In
  • Width: 1 In
  • Height: 1 In
  • Weight: 0 lbs
https://partsfe.com/media/catalog/product/t/u/turbochef-i132201-ngo-sota-left-hinge-service-kit-51618.jpg
Write Your Own Review
You're reviewing:TurboChef I132201 Left Hinge Service Kit NGO-SOTA
Your Rating
Customer Questions
What maintenance is required for the TurboChef I132201 Hinge Service Kit?

Regularly inspect the hinge assembly for looseness, wear, or misalignment. Lubricate moving hinge points with food-safe high-temperature lubricant. Tighten mounting hardware to prevent door pressure. Proper maintenance ensures smooth door operation.

What are common issues with the TurboChef I132201 Hinge Service Kit?

  • Door misalignment causing improper sealing.
  • Excessive hinge wear leading to stiffness.
  • Loose mounting hardware causing wobble.
  • Cracking or fatigue in hinge components.

We strive to provide our customers with a hassle-free and efficient shopping experience. Our shipping policy ensures the timely delivery of your orders and complete customer satisfaction. View More

We are committed to ensuring your complete satisfaction with every purchase. We understand that circumstances may arise where you must return a product or request a refund. If for any reason you are not satisfied, you may return the item(s) according to the terms outlined below. View More

This Payment Policy outlines the terms and conditions governing all payments made for products purchased through our website. By making a purchase, you agree to be bound by this Payment Policy. View More

Installation Steps

Step1: Disconnect power and apply lockout/tagout before servicing the oven.

Step2: Open door fully and support it securely to avoid dropping.

Step3: Remove interior and exterior mounting screws securing the left hinge.

Step4: Detach the old hinge assembly from door and frame.

Step5: Position new hinge kit and align with original mounting points.

Step6: Tighten all screws evenly and ensure smooth door movement.

Step7: Reassemble panels, restore power, and test door operation.