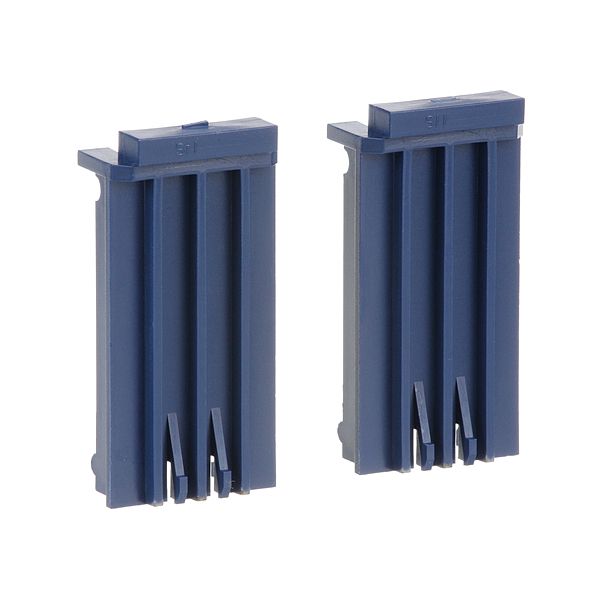
Edlund I066 Base Insert U12/G2/S11

Special Price $34.71 Regular Price $41.00
In stock
SKU
I066
Manufacturer:
The Edlund I066 Base Insert functions as an essential accessory which improves the operational capabilities of U-12, S-11, and G-2 series can openers. The insert functions as a direct repair component for broken parts to maintain high performance of your can opener. This parts stands out because it comes from American factories to deliver dependable performance in busy improve kitchens. This lightweight insert measures 3.13" x 1.39" and features an easy installation process and maintenance system which suits busy kitchen environments.

Dimensions

  • Length: 3 In
  • Width: 1.5 In
  • Height: 3 In
  • Weight: 0.2 lbs
https://partsfe.com/media/catalog/product/e/d/edlund-i066-base-insert-27259.jpg

Product Notes

  • Base Insert For #11 Can Opener, Also Used On G2, U12
  • Edlund
EDLUND:
EDLI066, I066
Write Your Own Review
You're reviewing:Edlund I066 Base Insert U12/G2/S11
Your Rating
Customer Questions
What maintenance is required for the Edlund I066 Base Insert?

Clean the insert regularly to remove food residue, grease, and moisture buildup. Inspect for wear or deformation to ensure proper alignment. Tighten and secure fitting points during service checks. Proper maintenance prevents operational issues and ensures stable, better performance.

What are common issues with the Edlund I066 Base Insert?

  • Loosening or poor fit in the base assembly.
  • Wear from repeated mechanical use.
  • Corrosion due to moisture exposure.
  • Misalignment affecting stability and performance.
  • Cracking or deformation under heavy load.
  • Buildup of debris interfering with proper seating.

We strive to provide our customers with a hassle-free and efficient shopping experience. Our shipping policy ensures the timely delivery of your orders and complete customer satisfaction. View More

We are committed to ensuring your complete satisfaction with every purchase. We understand that circumstances may arise where you must return a product or request a refund. If for any reason you are not satisfied, you may return the item(s) according to the terms outlined below. View More

This Payment Policy outlines the terms and conditions governing all payments made for products purchased through our website. By making a purchase, you agree to be bound by this Payment Policy. View More

Installation Steps

Step1: Disconnect power to the appliance for safety.

Step2: Remove the existing base insert and clean the mounting area thoroughly.

Step3: Inspect surrounding components for wear or debris before installation.

Step4: Align the new base insert with the original mounting position carefully.

Step5: Secure the insert using the existing retaining hardware or fasteners.

Step6: Verify the insert sits flush and does not interfere with moving parts.

Step7: Restore power and test equipment operation for proper alignment and stability.