Garland G02716-3 Thermostat Black Knob 2-1/2"

Special Price $10.50 Regular Price $13.13
In stock
SKU
G02716-3
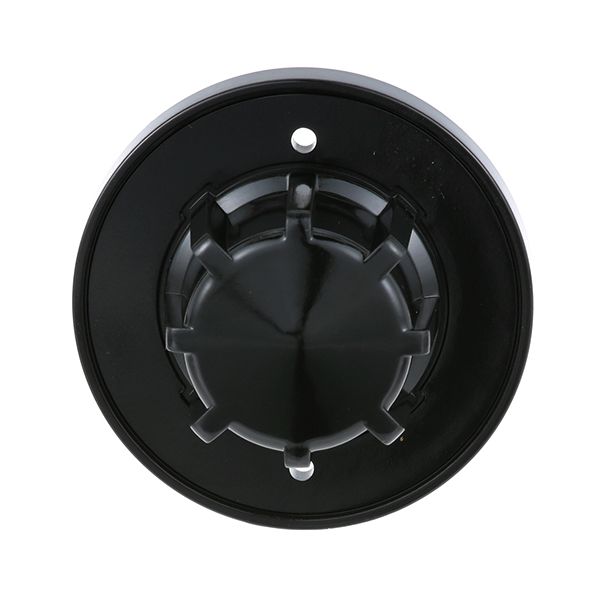
The Garland G02716-3 Thermostat Black Knob is controlled by turning the shaft to change the temperature setting, which translates manual control into automatic heat control. This is turned to match internal markings with the temperature points chosen to indicate changes to the mechanism. This is attached to the control panel on the front side. It has a 2 1/2" diameter and a 4-way mounting position that enables it to be aligned properly when installing it. The black coating and molded grip ensure visibility and rotation.

Dimensions

  • Length: 2.5 In
  • Width: 1.25 In
  • Height: 1.25 In
  • Weight: 0.1 lbs
https://partsfe.com/media/catalog/product/g/a/garland-g02716-3-oven-thermostat-black-knob-with-2-1-2-4-way-mounting-position-84974-2.jpg

Product Notes

  • Fd T'Stat Black Knob, [ 2-1/2" Dia ] [Mount .290"]
  • [Position 4-Way Mounting,
  • Garland Oven G2071, G2121, G2161, G2771, G48P,
  • G48Pa, G48Pd, G48Ps, G48Psa, G48Psd, Gpd48, Gpd60
  • Oven H284-2. Series: 40/50, 40R, G280, G293, G380.
CLEVELAND:
GARLAND:
Write Your Own Review
You're reviewing:Garland G02716-3 Thermostat Black Knob 2-1/2"
Your Rating
Customer Questions
What is the Best Electric Griddle?

Electric Griddle is an electronic equipment that uses an electric element as its heat source. It has a large cooking surface often made up of nonstick material. Electric Griddle has a surface which you do not find in the regular stovetop cookware. ...

What maintenance is required for the Garland G02716-3 Thermostat Knob?

Regularly inspect the knob for cracks, looseness, or wear to ensure accurate temperature control. Clean it using a soft cloth to remove grease and debris that may affect grip or readability. Avoid using chemicals that can damage the finish or markings. Proper maintenance ensures better operation and consistent oven temperature control.

What are common issues with the Garland G02716-3 Thermostat Knob?

  • Knob becomes loose or slips on the shaft.
  • Cracks or breakage from heat exposure or impact.
  • Difficulty turning due to grease buildup or internal wear.
  • Misalignment causing incorrect temperature setting readings.

We strive to provide our customers with a hassle-free and efficient shopping experience. Our shipping policy ensures the timely delivery of your orders and complete customer satisfaction. View More

We are committed to ensuring your complete satisfaction with every purchase. We understand that circumstances may arise where you must return a product or request a refund. If for any reason you are not satisfied, you may return the item(s) according to the terms outlined below. View More

This Payment Policy outlines the terms and conditions governing all payments made for products purchased through our website. By making a purchase, you agree to be bound by this Payment Policy. View More

Installation Steps

Step1: Turn off oven power and ensure it is completely cool before starting.

Step2: Remove the old knob by pulling it straight off the thermostat shaft.

Step3: Align the new knob with the shaft’s flat edge.

Step4: Push the knob firmly into place until secure.

Step5: Adjust to ensure smooth rotation and correct positioning.

Step6: Restore power and test functionality.