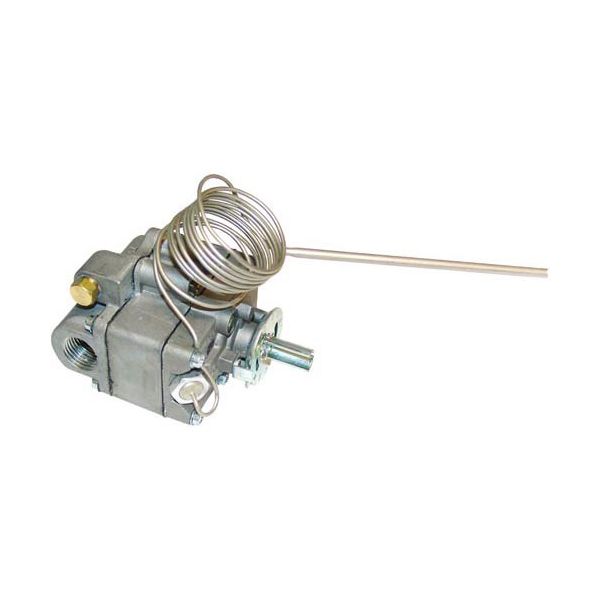
Bakers Pride M1006X Oven Thermostat W/ 3/16" X 14-1/4" Bulb 1/2" FPT

Special Price $628.84 Regular Price $985.64
In stock
SKU
M1006X
The Bakers Pride M1006X Thermostat functions as a durable precise temperature controller which specifically targets ovens. The M1006X thermostat operates through a 3/16" x 14-1/4" bulb which connects to a 1/2" FPT port to provide efficient temperature control. This thermostat improves cooking precision so it works best for commercial kitchens which demand consistent outcomes. This device combines durable materials with straightforward installation and maintenance features because of its easy-to-use design. The component serves high-temperature environments to optimize oven performance thus minimizing waste and maximizing food preparation productivity.

Dimensions

  • Length: 12 In
  • Width: 2.25 In
  • Height: 2.5 In
  • Weight: 1.2 lbs
https://partsfe.com/media/catalog/product/b/a/bakers-pride-m1006x-oven-thermostat-w-3-16-x-14-1-4-bulb-1-2-fpt-25319.jpg

Product Notes

  • [ Fdto-1 ] [ Temp Low 250-550 ] [ Bulb 3/16" X 14-1/4" ]
  • [ Cap 54" ] [ Gas 1/2" Fpt In/Out( Side ) F & E ]
  • [ Dial # 22-1009 150-550 ] Or
  • [ # 22-1203 Low-250-550 ]
  • Bakers Pride
  • Oven 101, 104, 201, 204, 301, 304, 401, 404.
  • Southbend
  • Grill T-121-0/1, T-161-0/1, T-1361, T-1421-0/1.
  • Oven 136 & 142 & W/Suffix -0 & -1.
BAKERS PRIDE:
AS-M1006X, BKPM1006X, M1006X, M1038X
U-LINE:
4200-017, 4200-01G
Write Your Own Review
You're reviewing:Bakers Pride M1006X Oven Thermostat W/ 3/16" X 14-1/4" Bulb 1/2" FPT
Your Rating
Customer Questions
What maintenance is required for the Bakers Pride M1006X Thermostat?

Clean the oven thermostat probe and bulb regularly to prevent grease buildup and inaccurate readings. Inspect wiring and connections for looseness or corrosion. Ensure proper calibration and replace damaged sensing bulb promptly to maintain stable temperature control.

What are common issues with the Bakers Pride M1006X Thermostat?

  • Damaged bulb/capillary tube.
  • Slow response to heat changes.
  • Failure to maintain set temperature.
  • Electrical connection faults.
  • Gas flow inconsistencies.

We strive to provide our customers with a hassle-free and efficient shopping experience. Our shipping policy ensures the timely delivery of your orders and complete customer satisfaction. View More

We are committed to ensuring your complete satisfaction with every purchase. We understand that circumstances may arise where you must return a product or request a refund. If for any reason you are not satisfied, you may return the item(s) according to the terms outlined below. View More

This Payment Policy outlines the terms and conditions governing all payments made for products purchased through our website. By making a purchase, you agree to be bound by this Payment Policy. View More

Installation Steps

Step1: Turn off gas and electrical power and allow oven to fully cool before servicing.

Step2: Remove control panel and disconnect old thermostat capillary tube and wiring carefully.

Step3: Install new thermostat in original mounting position and secure firmly.

Step4: Route sensing bulb into oven cavity, avoiding sharp bends or contact with hot surfaces.

Step5: Reconnect wiring and gas capillary connections per wiring diagram.

Step6: Restore power and gas, then test temperature control and verify safe cycling operation.