Pitco PP10098 Fryer Rocker Switch DPDT On-Off- N,TT

Special Price $66.98 Regular Price $129.00
In stock
SKU
PP10098
Manufacturer:
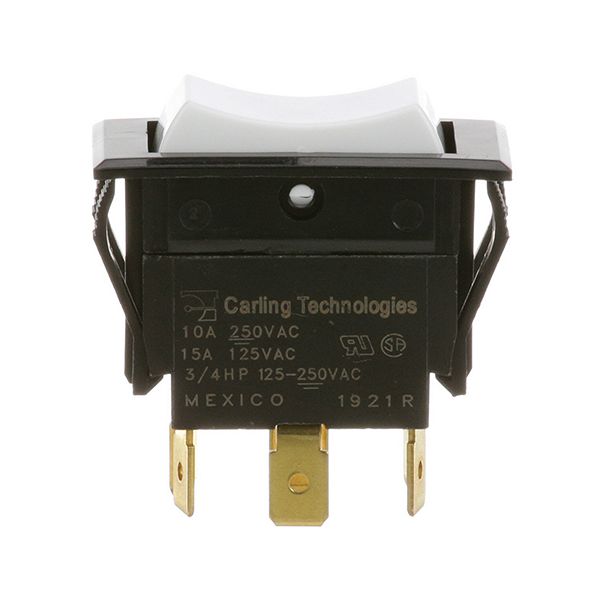
The Pitco PP10098 Fryer Rocker Switch DPDT On-Off- N, that allows the flow of electricity by mechanically rocking between two different positions to open or close two different circuits at the same time. It has a double-pole and throw design, which enables the control of power routing by switching contact paths. This is usually attached to the control panel of the fryer so that it can be accessed directly when in operation. It is designed to be used with electrical systems and has on-off capability on specific circuits, but has standard electrical connections.

Dimensions

  • Length: 2 In
  • Width: 1.25 In
  • Height: 1 In
  • Weight: 0.05 lbs
https://partsfe.com/media/catalog/product/p/i/pitco-pp10098-switch-rocker-dpdt-on-off-n-tt-23750.jpg

Product Notes

  • Switch Fits 7/8In X 1-1/2In Opening
  • Amp: 15/10 @ 250V
  • Note: Fits 7/8 X 1 1/2In Opening
  • Switch Actions: On/Off/On
  • Switch Type: Dpdt
  • Terminals: 1/4In Tab Terminals (6)
  • Type: Rocker
  • Voltage: 125/250 Vac
  • Weight: 0.05 Lb
  • Models Used In:
  • True Mfg. Co. Gdm-33, Gdm-47, T-23-2, T-24-Gc, T-36-Gc, T-49,
  • Tbb-24-48, Tbb-4, Td-24-7, Td-50-18, Tpp-60D-2 115V,
  • Tssu-27-12M-C 115V, Tssu-27-8, Tssu-27-8 115V,
  • Tssu-48-12 115V, Tssu-48-8-47, Tuc-67D-2, Twt-48
Write Your Own Review
You're reviewing:Pitco PP10098 Fryer Rocker Switch DPDT On-Off- N,TT
Your Rating
Customer Questions
What maintenance is required for the Pitco PP10098 Rocker Switch?

Keep the fryer switch clean and check for smooth operation. Inspect wiring connections and ensure proper mounting. Routine maintenance supports accurate switching and secure electrical control.

What are common issues with the Pitco PP10098 Rocker Switch?

  • Switch not toggling correctly.
  • Loose electrical connections affecting function.
  • Intermittent power control issues.
  • Worn internal contacts reducing accuracy.
  • Switch sticking during operation.
  • Delayed response when activated.
  • Inconsistent switching performance.

We strive to provide our customers with a hassle-free and efficient shopping experience. Our shipping policy ensures the timely delivery of your orders and complete customer satisfaction. View More

We are committed to ensuring your complete satisfaction with every purchase. We understand that circumstances may arise where you must return a product or request a refund. If for any reason you are not satisfied, you may return the item(s) according to the terms outlined below. View More

This Payment Policy outlines the terms and conditions governing all payments made for products purchased through our website. By making a purchase, you agree to be bound by this Payment Policy. View More

Installation Steps

Step1: Disconnect the fryer from the power source to prevent electrical shock.

Step2: Remove the front control panel to access the rocker switch.

Step3: Carefully disconnect the wires from the old switch, noting their positions.

Step4: Insert the new rocker switch into the panel opening securely.

Step5: Reconnect the wires to the correct terminals.

Step6: Reassemble the panel, restore power, and test the switch for proper operation.