

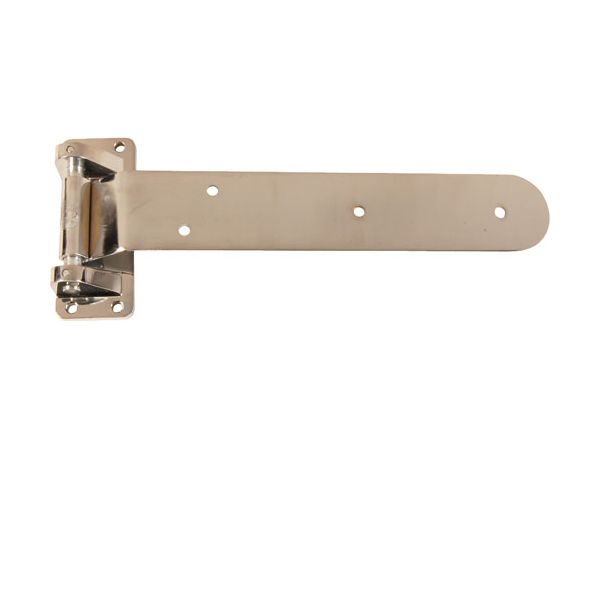
Premco PRC18S FLUSH ZINC Strap Hinge Flush Cam Lift 19"L

Special Price $79.06 Regular Price $95.72
In stock
SKU
PRC18S FLUSH ZINC
Manufacturer:

The Ranco Premco PRC18S FLUSH ZINC Strap Hinge represents a strong steel hinge intended for flush installation combines robust performance with a smooth appearance. This hinge supports heavy-duty applications through its 18 15/16" overall length and 3" strap width. The chrome plating on this hinge protects it from corrosion so it delivers extended durability. The hinge operates smoothly because of its flush cam lift design and 7 1/8" base height which allows it to work effectively in doors, gates, and cabinetry. The hinge provides both solid power and quick deployment along with an elegant professional design.

Dimensions

  • Length: 19 In
  • Width: 7.25 In
  • Height: 2.5 In
  • Weight: 4.925 lbs
https://partsfe.com/media/catalog/product/p/r/premco-prc18s-flush-zinc-strap-hinge-flush-cam-lift-19-l-79240.jpg

Product Notes

  • Material: Steel
  • Length: 18 15/16" Overall | 481 mm Overall
  • Width: 3" Strap | 76 mm Strap
  • Height: 7 1/8" Base | 181 mm Base
  • Plating: Chrome-Plated
  • Offset: Flush Mount .
Write Your Own Review
You're reviewing:Premco PRC18S FLUSH ZINC Strap Hinge Flush Cam Lift 19"L
Your Rating
Customer Questions
What maintenance is required for the Premco PRC18S FLUSH ZINC Strap Hinge Flush Cam Lift?

Regularly inspect the hinge for looseness, wear, or corrosion, especially around pivot points. Lubricate moving parts to ensure smooth cam lift operation. Tighten mounting screws as needed and clean off dirt or grease buildup to prevent binding and maintain proper alignment.

What are common issues with the Premco PRC18S FLUSH ZINC Strap Hinge Flush Cam Lift?

  • Pivot damage causing stiffness or uneven movement.
  • Loose mounting screws leading to instability.
  • Corrosion or rust on zinc-coated surfaces.
  • Misalignment affecting smooth cam lift action.
  • Squeaking or noise during operation.
  • Reduced lifting efficiency from worn hinge components.

We strive to provide our customers with a hassle-free and efficient shopping experience. Our shipping policy ensures the timely delivery of your orders and complete customer satisfaction. View More

We are committed to ensuring your complete satisfaction with every purchase. We understand that circumstances may arise where you must return a product or request a refund. If for any reason you are not satisfied, you may return the item(s) according to the terms outlined below. View More

This Payment Policy outlines the terms and conditions governing all payments made for products purchased through our website. By making a purchase, you agree to be bound by this Payment Policy. View More

Installation Steps

Step1: Disconnect power and secure the door or panel before starting installation.

Step2: Remove the existing hinge and clean the mounting surfaces on both frame and door.

Step3: Position the new hinge in the correct flush alignment on the mounting points.

Step4: Mark and drill pilot holes if required for fasteners.

Step5: Secure the hinge tightly to both surfaces using proper hardware.

Step6: Test the cam lift action to ensure smooth, even door movement.

Step7: Verify alignment and stability before returning the unit to service.