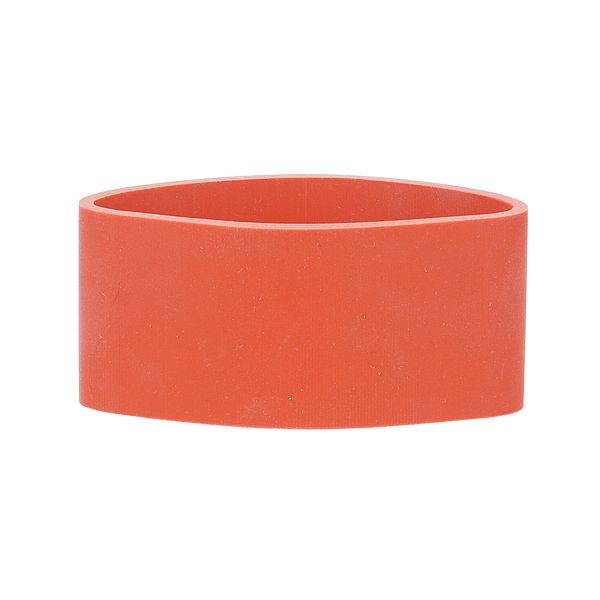
Pitco PT60059302 Drain Line Sleeve Gasket 2-7/8"X 2"
Special Price $86.71 Regular Price $167.00
In stock
SKU
PT60059302
Manufacturer:

The Pitco PT60059302 Drain Line Sleeve Gasket 2-7/8"X 2" is a seal that is formed by compressing between two drain parts to hold oil and prevent leakage when in operation and draining. The material, when tightened, fits into the drain line opening and the valve surfaces, keeping the inside of the fryer and the outside drain line apart. The gasket is fitted on drain line connection between the fry pot outlet and the drain valve assembly. It is also designed to fit the inside diameter as required.
Dimensions
- Length: 4 In
- Width: 2 In
- Height: 1.75 In
- Weight: 0.12 lbs
Product Notes
- Drain Line Sleeve Gasket, 2-7/8" Id X 2"
- Pitco Fryers Fg-Sgh50-Fd-50-Bt-50-2, Lj-Fbg18, Lj-Fbg24,
- Lj-Fbgd18, Lj-Fbgd24, Me2, Meii, Se14,
- Se147, Se148X, Se14R,
- Se14T, Se14Tr, Se14Tx, Se14X, Se18, Se18R, Se18S, Se714,
- Sebnb14, Sebnb18, Seh50, Sfse14, Sfse14R,
- Sfse14T, Sfse14Tr,
- Sfse14Tx, Sfse14X, Sfse18, Sfse18R, Sg14, Sg14Di, Sg14R,
- Sg14Rdi, Sg14Rs, Sg14S-D, Sg14T, Sg14Tdi, Sg18, Sg18Di,
- Sg18F, Sg18S, Sg18S-D, Sgc, Sgh50, Sgm1824, Sgm24, Sgm34,
- Sgsebnb-14, Sgsebnb-18, Ssh55, Ssh75, Ssh75Rs