
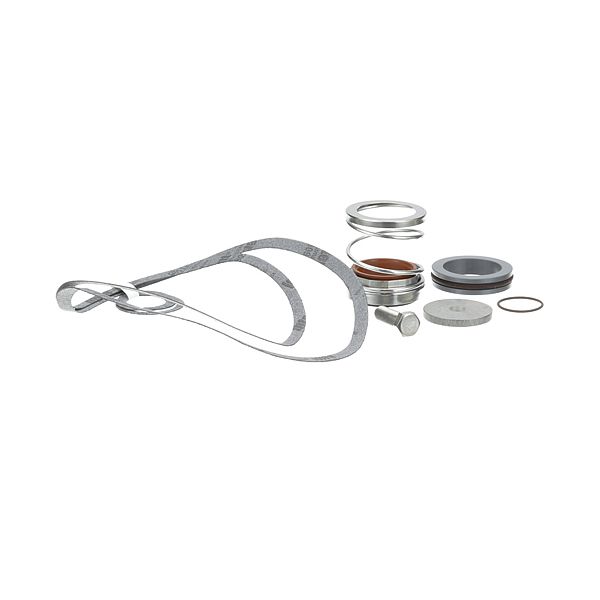
Power Soak Systems PWSK24463 Seal Kit

Special Price $519.47 Regular Price $814.22
In stock
SKU
PWSK24463
Manufacturer:

The Power Soak Systems PWSK24463 Seal Kit functions as an advanced replacement component that secures tight and dependable seals within the machine’s wash system. The kit contains every essential seal needed to optimize cleaning efficiency while stopping leaks in the system. This serves two purposes, it enhances equipment longevity and it maintains consistent performance while decreasing maintenance interruptions. The seal kit delivers improve kitchen and food service benefits through its ability to create cleaner hygienic conditions and decrease repair and replacement requirements.

Dimensions

  • Length: 6 In
  • Width: 4 In
  • Height: 3 In
  • Weight: 0.5 lbs
https://partsfe.com/media/catalog/product/p/o/power-soak-systems-pwsk24463-seal-kit-12855.jpg
Manufacturer Name: Power Soak Systems
Product Number: PWSK24463
OEM Part Number: PWSK24463
Product Description: Seal Kit
Similar Models:24463 - Power-Soak-Systems
Dimensions:
Length:6in/15.24cm
Width:4in/10.16cm
Height:3in/7.62cm
Weight:0.5lbs/226.8g

Choose the best Commercial kitchen & Restaurant equipment parts and supplies from PartsFe!

  • Same Day Shipping

  • Best Quality And Best Price

  • Wide Range of Inventory

  • Best Customer Service

Have More Questions or Need Help to Place The Order?
Reach us at 866-863-0907 or contact@partsfe.com

POWERSOAK:
Write Your Own Review
You're reviewing:Power Soak Systems PWSK24463 Seal Kit
Your Rating
Customer Questions
What maintenance is required for the Power Soak Systems PWSK24463 Seal Kit?

Inspect the seal for cracks, deformation, or hardening. Clean it gently to maintain a tight and efficient seal. Ensure proper placement during assembly to provide accurate water containment and consistent operation.

What are common issues with the Power Soak Systems PWSK24463 Seal Kit?

  • Leaks around the unit due to seal wear.
  • Seal deformation causing poor fit.
  • Difficulty maintaining water level.
  • Uneven contact reducing efficiency.
  • Loss of pressure or inconsistent containment.
  • Seal sticking or compressing irregularly, affecting operation.

We strive to provide our customers with a hassle-free and efficient shopping experience. Our shipping policy ensures the timely delivery of your orders and complete customer satisfaction. View More

We are committed to ensuring your complete satisfaction with every purchase. We understand that circumstances may arise where you must return a product or request a refund. If for any reason you are not satisfied, you may return the item(s) according to the terms outlined below. View More

This Payment Policy outlines the terms and conditions governing all payments made for products purchased through our website. By making a purchase, you agree to be bound by this Payment Policy. View More

Installation Steps

Step1: Turn off and unplug the appliance to prevent electrical hazards.

Step2: Remove the lid or tank components to access the old seal.

Step3: Pull out the old seal carefully.

Step4: Clean the sealing surface to remove debris or residue.

Step5: Press the new seal evenly into place, ensuring no gaps or twists.

Step6: Reassemble the lid or tank and run a short water test to check for leaks.