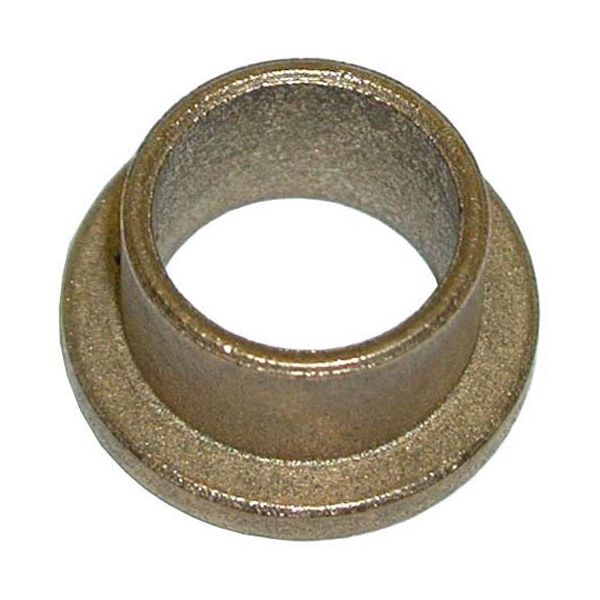
Middleby Marshall 22034-0003 Oven Bushing Flange 3/4" OD X 5/8" ID

Special Price $9.32 Regular Price $9.91
In stock
SKU
22034-0003
The Middleby Marshall 22034-0003 Oven Bushing Flange 3/4" OD x 5/8" ID is a part that supports and directs a rotating shaft or rod through a smooth passage that wear and helps to keep the system aligned. It works by pushing its outer diameter into a mounting hole the inner diameter contains the shaft as it rotates or slides through the flange. This bushing flange is fitted in a where a shaft runs through the frame, panel or bracket of the oven that the outer side of the flange fits in the hole the inner bore fits in the moving part.

Dimensions

  • Length: 1 In
  • Width: 1 In
  • Height: 0.5 In
  • Weight: 0.1 lbs
https://partsfe.com/media/catalog/product/m/i/middleby-marshall-22034-0003-bronze-shoulder-bushing-753-od-x-625-id-x-1-od-shoulder-13270-2.jpg

Product Notes

  • Shoulder Bushing, Bronze,
  • .753" Od X .625" Id X 1" Od Shoulder,
  • 1/2" Wide With .125" Thick Shoulder
  • ( Used With Support Bracket #26-4976 )
  • Middleby Marshall
  • Oven Ps200-R68, Ps220Fs-R68, Ps224-R68, Ps310, Ps360,
  • Ps360Wb70, Ps570 Single Belt
MIDDLEBY MARSHALL:
Write Your Own Review
You're reviewing:Middleby Marshall 22034-0003 Oven Bushing Flange 3/4" OD X 5/8" ID
Your Rating
Customer Questions
What maintenance is required for the Middleby Marshall 22034-0003 Shoulder Bushing?

Inspect the bushing for wear and lubricate if compatible with appliance instructions. Check for proper alignment in the shaft and remove if metal fatigue or cracking is observed.

What are common issues with the Middleby Marshall 22034-0003 Shoulder Bushing?

  • Excessive play causing misalignment.
  • Wear or grooves on the bearing surface.
  • Difficulty in shaft rotation.
  • Cracks or deformation under load.

We strive to provide our customers with a hassle-free and efficient shopping experience. Our shipping policy ensures the timely delivery of your orders and complete customer satisfaction. View More

We are committed to ensuring your complete satisfaction with every purchase. We understand that circumstances may arise where you must return a product or request a refund. If for any reason you are not satisfied, you may return the item(s) according to the terms outlined below. View More

This Payment Policy outlines the terms and conditions governing all payments made for products purchased through our website. By making a purchase, you agree to be bound by this Payment Policy. View More

Installation Steps

Step1: Turn off and unplug the equipment before starting.

Step2: Remove any old or worn bushing from the shaft.

Step3: Clean the shaft and surrounding area to remove debris.

Step4: Slide the new bushing onto the shaft, ensuring proper orientation.

Step5: Press gently until fully seated, avoiding excessive force.

Step6: Reassemble any components removed and test rotation for smooth operation.