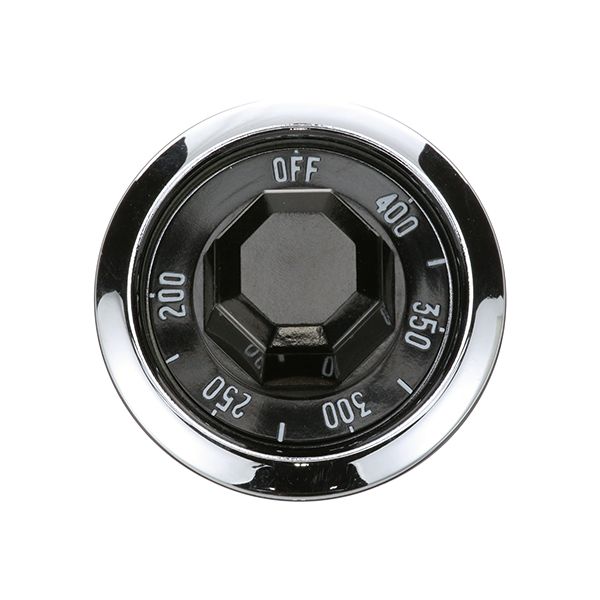
Southbend SOU1192521 HDG Knob and Bezel Assembly

$62.80
In stock
SKU
SOU1192521
The Southbend SOU1192521 HDG Knob and Bezel Assembly is a control button with a frame around it that enables the user to select and adjust the settings of the cooking equipment and that looks complete on the control panel. The handle clips into the motor shaft, and the rim surrounds it to hold it in position and distance. This is installed in the cutout in the panel where the control interface is found. It is the screen that allows the user to choose the temperature or the position of operations on the controls of the appliance.

Dimensions

  • Length: 6 In
  • Width: 3 In
  • Height: 1.5 In
  • Weight: 0.7 lbs
https://partsfe.com/media/catalog/product/s/o/southbend-sou1192521-hdg-knob-and-bezel-assembly-30242.jpg
SOUTHBEND:
Write Your Own Review
You're reviewing:Southbend SOU1192521 HDG Knob and Bezel Assembly
Your Rating
Customer Questions
What is the Best Electric Griddle?

Electric Griddle is an electronic equipment that uses an electric element as its heat source. It has a large cooking surface often made up of nonstick material. Electric Griddle has a surface which you do not find in the regular stovetop cookware. ...

What maintenance is required for the Southbend SOU1192521 Knob And Bezel Assembly?

Inspect the knob and bezel regularly for cracks, looseness, or signs of heat damage. Clean the surfaces with a non-abrasive cleaner to prevent grease buildup that can affect operation. Ensure the assembly rotates smoothly and remains securely attached to the thermostat shaft.

What are common issues with the Southbend SOU1192521 Knob And Bezel Assembly?

  • Loose bezel assembly.
  • Knob slipping or hard turning.
  • Misalignment of dial indicator.
  • Wear causing reduced responsiveness.
  • Cracked bezel housing.

We strive to provide our customers with a hassle-free and efficient shopping experience. Our shipping policy ensures the timely delivery of your orders and complete customer satisfaction. View More

We are committed to ensuring your complete satisfaction with every purchase. We understand that circumstances may arise where you must return a product or request a refund. If for any reason you are not satisfied, you may return the item(s) according to the terms outlined below. View More

This Payment Policy outlines the terms and conditions governing all payments made for products purchased through our website. By making a purchase, you agree to be bound by this Payment Policy. View More

Installation Steps

Step1: Disconnect power and gas supply for safety before starting and verify isolation.

Step2: Remove existing knob and bezel carefully using proper tools.

Step3: Align new bezel with control panel opening ensuring correct orientation.

Step4: Insert mounting hardware and tighten securely without over-torquing.

Step5: Attach knob onto control shaft firmly and check fit.

Step6: Ensure smooth rotation and proper alignment of components.

Step7: Restore power and test operation for correct function safely.