Lincoln 369643 Conveyor Oven Door Handle Strike

Special Price $17.77 Regular Price $23.07
In stock
SKU
369643
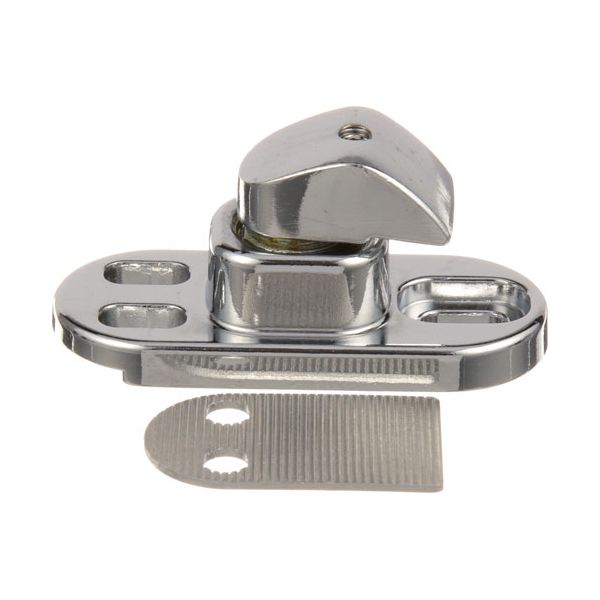
The Lincoln 369643 Conveyor Oven Door Handle Strike is a mechanical part of the alignment that is used to hold the door of the cooker when it is in operation. It is attached to the door frame and interacts with the handle to have the right closures as the conveyor oven runs. This component is applied in the commercial conveyor oven where the heat retention and door placement are under control to achieve a constant cooking outcome. It is kept in the right position by aligning the door to ensure safe operation.

Dimensions

  • Length: 2.5 In
  • Width: 1 In
  • Height: 1.5 In
  • Weight: 0.18 lbs
https://partsfe.com/media/catalog/product/l/i/lincoln-369643-door-handle-strike-3-4-x-2-3-8-1-1-2-mount-hole-for-latch-46880-2.jpg

Product Notes

  • Door Handle Strike Only
  • Strike 3/4" X 2 3/8", 1 1/2" Mount Hole Centers
  • For Latch Part #22-1078, 22-1101
  • Series: R26
  • Alto-Shaam Food Warmer 500-10, 500-20, 500-30
  • Lincoln Oven Series 1000, 1200
ALTO-SHAAM:
LINCOLN:
Write Your Own Review
You're reviewing:Lincoln 369643 Conveyor Oven Door Handle Strike
Your Rating
Customer Questions
What maintenance is required for the Lincoln 369643 Door Handle Strike?

Regularly inspect the strike plate for alignment and wear. Tighten any loose mounting screws and lightly lubricate moving parts if needed. Check for corrosion or deformation. Proper care ensures smooth latching and prevents door misalignment.

What are common issues with the Lincoln 369643 Door Handle Strike?

  • Misalignment causing difficulty latching.
  • Loose or stripped mounting screws.
  • Corrosion or rust buildup.
  • Wear on the strike plate affecting door closure.

We strive to provide our customers with a hassle-free and efficient shopping experience. Our shipping policy ensures the timely delivery of your orders and complete customer satisfaction. View More

We are committed to ensuring your complete satisfaction with every purchase. We understand that circumstances may arise where you must return a product or request a refund. If for any reason you are not satisfied, you may return the item(s) according to the terms outlined below. View More

This Payment Policy outlines the terms and conditions governing all payments made for products purchased through our website. By making a purchase, you agree to be bound by this Payment Policy. View More

Installation Steps

Step1: Ensure the equipment is turned off before starting.

Step2: Locate and remove the existing strike.

Step3: Position the new strike over the mounting holes.

Step4: Loosely fasten screws to allow minor adjustments.

Step5: Align with the latch for proper engagement.

Step6: Tighten screws securely and test door closing for a firm hold