
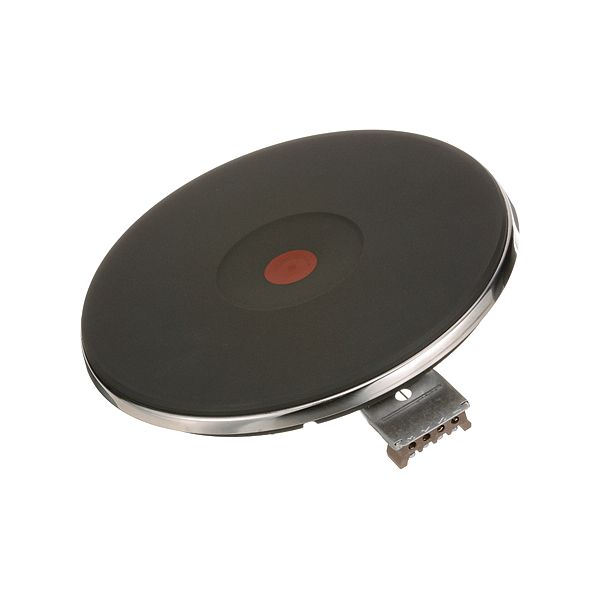
Garland 2147100 Sealed Element 8-3/4" 2000W 208V

Special Price $259.12 Regular Price $558.45
In stock
SKU
2147100
Manufacturer:

The Garland 2147100 Sealed Element 8-3/4" 2000W 208V is a part that changes electrical energy into thermal energy using an internal resistive coil that is enclosed by a metal casing. This design supports transferring the heat directly to the cookware resting on the surface, and liquid spills do not touch the internal wiring. The constituent is mounted flat in the upper deck of a commercial appliance to provide a level and stable cooking surface. The part has a diameter of 8 3/4 inches, which fits into a certain cutout on the chassis to allow a flush.

Dimensions

  • Length: 9 In
  • Width: 9 In
  • Height: 3 In
  • Weight: 3 lbs
https://partsfe.com/media/catalog/product/g/a/garland-2147100-208v-2000w-surface-heater-4-term-fits-8-3-4-77073-2.jpg

Product Notes

  • Sealed Surface Element, 208V 2600W, 4 Term,
  • Fits 8-3/4" Hole
  • Garland 684Rc, 686Rc, Ed-15Hse, Edu-15Hse, Ss684, Ss686,
  • Su684, Su686
GARLAND:
MIDDLEBY MARSHALL:
SOUTHBEND:
STAR MFG:
Write Your Own Review
You're reviewing:Garland 2147100 Sealed Element 8-3/4" 2000W 208V
Your Rating
Customer Questions
What is the Best Electric Griddle?

Electric Griddle is an electronic equipment that uses an electric element as its heat source. It has a large cooking surface often made up of nonstick material. Electric Griddle has a surface which you do not find in the regular stovetop cookware. ...

What maintenance is required for the Garland 2147100 Surface Heater?

Regularly inspect the heater for signs of wear, corrosion, or damaged terminals. Keep the surface clean to prevent buildup that can affect heat transfer. Ensure electrical connections remain tight and secure. Always disconnect power before servicing to avoid electrical hazards.

What are common issues with the Garland 2147100 Surface Heater?

  • Uneven or insufficient heating output.
  • Burned-out heating element.
  • Loose or damaged terminal connections.
  • Slow heat-up or failure to reach temperature.
  • Electrical short or intermittent operation.

We strive to provide our customers with a hassle-free and efficient shopping experience. Our shipping policy ensures the timely delivery of your orders and complete customer satisfaction. View More

We are committed to ensuring your complete satisfaction with every purchase. We understand that circumstances may arise where you must return a product or request a refund. If for any reason you are not satisfied, you may return the item(s) according to the terms outlined below. View More

This Payment Policy outlines the terms and conditions governing all payments made for products purchased through our website. By making a purchase, you agree to be bound by this Payment Policy. View More

Installation Steps

Step1: Disconnect power at breaker and check supply is fully off before servicing.

Step2: Remove old heater and safely disconnect terminals, labeling wires for reference.

Step3: Clean mounting surface in the area, removing debris and grease.

Step4: Position new heater and secure it using mounting hardware, ensuring flat contact.

Step5: Reconnect terminals per original wiring diagram, ensuring tight and insulated connections.

Step6: Restore power, test heating operation, and monitor for overheating or loose connections.