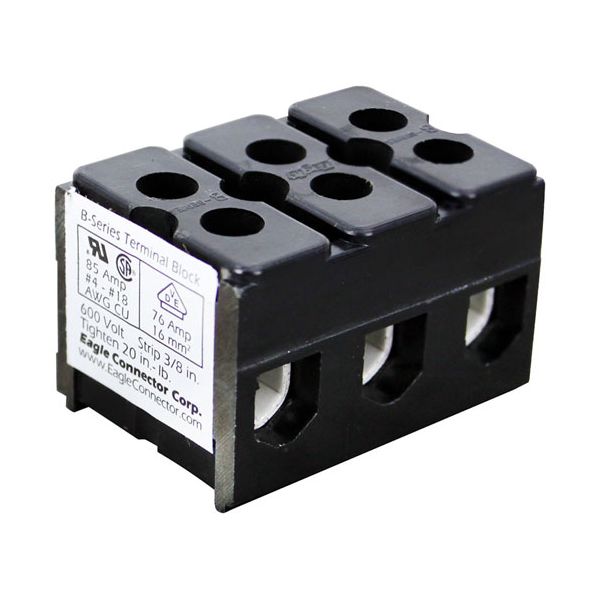
Southbend 1177361 Combi Oven Terminal Block 3-Pole 85A 600V

Special Price $14.21 Regular Price $29.01
In stock
SKU
1177361
Manufacturer:
Southbend 1177361 Terminal Block is an essential electrical connector that is used to securely handle the high power connections in commercial combi ovens. It is a 3-pole terminal block that can operate up to 85 amps at 600 volts, which enables efficient electrical current to be distributed to various parts of an oven. It is used to safely support of electrical wires and to maintain a stable flow of power with minimal possibility of electrical faults or overheating. This terminal block has been designed to be accurate and stable in order to keep high-capacity cooking equipment safe and functional kitchens.

Dimensions

  • Length: 2 In
  • Width: 1.2 In
  • Height: 1.2 In
  • Weight: 0.1 lbs
https://partsfe.com/media/catalog/product/s/o/southbend-1177361-3-pole-terminal-block-600v-85a-24885-2.jpg

Product Notes

  • Terminal Block, 3 Pole
  • Max 600V, 85 Amp
  • Alto-Shaam Food Warmers
  • Hatco
  • Booster Compact (480V Units: 4 To 18Kw & 24 To 45Kw),
  • Imperial & Powermite (480V Units: 24 To 45Kw).
  • Series: 3Cs, Fr.
  • Star Broiler 155, 157
  • Griddle 154, 156
Write Your Own Review
You're reviewing:Southbend 1177361 Combi Oven Terminal Block 3-Pole 85A 600V
Your Rating
Customer Questions
What maintenance is required for the Southbend 1177361 Terminal Block?

Regularly inspect the oven terminal block for loose connections, corrosion, or heat damage. Tighten terminals to proper torque specifications and ensure wiring insulation remains intact. Keeping connections secure prevents electrical faults. Always disconnect power before servicing to ensure safety during maintenance.

What are common issues with the Southbend 1177361 Terminal Block?

  • Overheating due to excessive current or poor contact.
  • Corrosion or oxidation on terminals affecting conductivity.
  • Cracked or damaged housing leading to electrical exposure risks.

We strive to provide our customers with a hassle-free and efficient shopping experience. Our shipping policy ensures the timely delivery of your orders and complete customer satisfaction. View More

We are committed to ensuring your complete satisfaction with every purchase. We understand that circumstances may arise where you must return a product or request a refund. If for any reason you are not satisfied, you may return the item(s) according to the terms outlined below. View More

This Payment Policy outlines the terms and conditions governing all payments made for products purchased through our website. By making a purchase, you agree to be bound by this Payment Policy. View More

Installation Steps

Step1: Disconnect power completely and verify zero voltage before opening the unit.

Step2: Remove rear panel to access the existing terminal block and wiring connections.

Step3: Label and carefully disconnect all wires from the old terminal block.

Step4: Remove mounting screws and take out the damaged terminal block.

Step5: Install the new terminal block in the same position and secure tightly.

Step6: Reconnect wires firmly to correct terminals and inspect for tight, clean contacts.

Step7: Restore power and test for stable electrical operation and no overheating.