
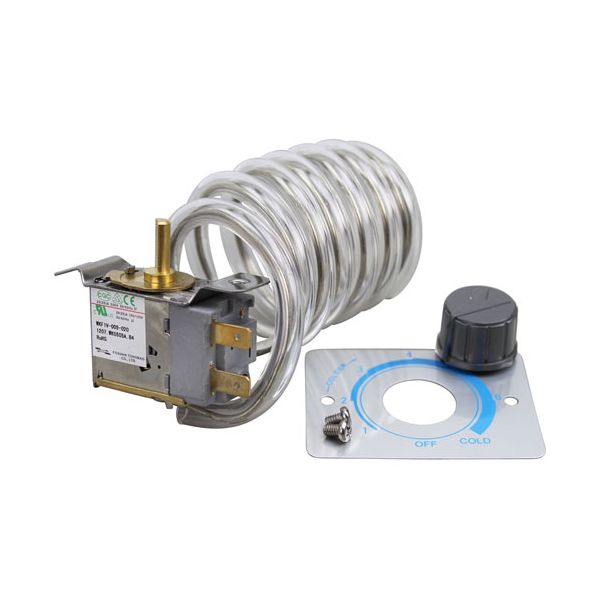
Glastender 06001405 Thermostat With Knob & Plate

Special Price $21.42 Regular Price $34.00
In stock
SKU
06001405
Manufacturer:

The Glastender 06001405 Thermostat Knob & Plate is an interface that has labels with a knob that displays temperature settings or adjustment markers. It is attached to the front panel in a manner that the thermostat knob can be rotated against a marked scale to adjust or establish the levels of temperature. It is attached to the thermostat control shaft on the compatible equipment where a completed control surface is required. This knob plate is applied in applications that are supposed to be in that style and layout of the temperature control interface.

Dimensions

  • Length: 4 In
  • Width: 2.5 In
  • Height: 2.5 In
  • Weight: 0.29 lbs
https://partsfe.com/media/catalog/product/g/l/glastender-06001405-thermostat-with-knob-and-plate-61424-2.jpg

Product Notes

  • Thermostat With Knob And Dial Plate
  • Temp Range +34 To 40F, Cap 47-3/4".
  • Glastender Bb108-H, Bb24, Bb36, Bb36-D, Bb48, Bb60, Bb60-H,
  • Bb72, Bb84, Bb84-H, Bb96, Ds24, Ds48, Ds72, Fv24, Fv48,
  • Kc-84, Kc24, Kc48, Kc52, Kc72, Kc84, Lc, Lp48, Lp72, Lp96,
  • Lpt36, Nd-94, Nd48, Nd52, Nd72, Pt108, Pt48, Pt60, Pt72,
  • Pt84, Pt96, R22 Lc, St24, St24-Bg, St36, St48, St48-Bg,
  • St48-Bg (2010 And After), St48-Bg (Prior To 2010), St60,
  • St72, St96, Ucr24S-L, Ucr24S-R, Ucr24X-L, Ucr24X-R
Write Your Own Review
You're reviewing:Glastender 06001405 Thermostat With Knob & Plate
Your Rating
Customer Questions
What maintenance is required for the Glastender 06001405 Thermostat With Knob And Plate?

Regularly inspect the thermostat, knob, and plate for wear or damage. Keep components clean and free from grease buildup to ensure accurate temperature control. Check connections for tightness and proper operation. Always disconnect power before servicing to prevent electrical hazards.

What are common issues with the Glastender 06001405 Thermostat With Knob And Plate?

  • Inaccurate temperature regulation or fluctuation.
  • Knob becoming loose or unresponsive.
  • Thermostat failing to cycle on or off.
  • Plate misalignment affecting control operation.

We strive to provide our customers with a hassle-free and efficient shopping experience. Our shipping policy ensures the timely delivery of your orders and complete customer satisfaction. View More

We are committed to ensuring your complete satisfaction with every purchase. We understand that circumstances may arise where you must return a product or request a refund. If for any reason you are not satisfied, you may return the item(s) according to the terms outlined below. View More

This Payment Policy outlines the terms and conditions governing all payments made for products purchased through our website. By making a purchase, you agree to be bound by this Payment Policy. View More

Installation Steps

Step1: Turn off power to the appliance before starting installation.

Step2: Remove the old thermostat by disconnecting wires and mounting screws.

Step3: Mount the thermostat in place of the old unit using the provided screws.

Step4: Connect wires to the corresponding terminals, ensuring tight, secure connections.

Step5: Restore power and test the thermostat for proper operation.