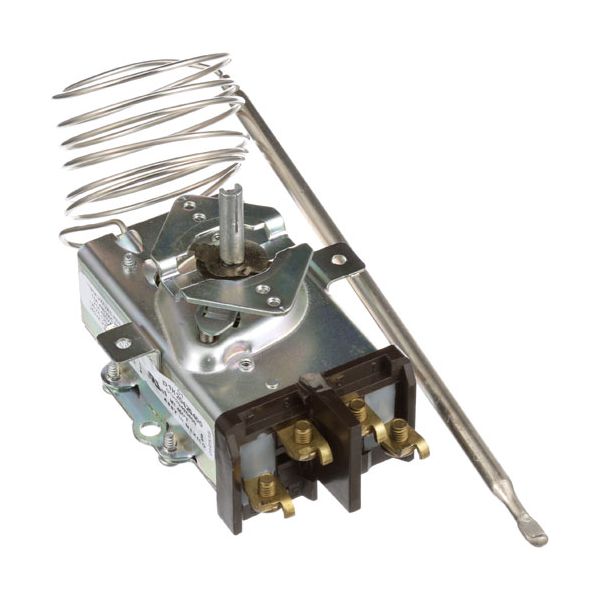
Garland 1102703 Griddle Thermostat W/ 1/4" X 7" Tin/Zinc Bulb, 100°F-450°F

Special Price $265.45 Regular Price $572.09
In stock
SKU
1102703
The Garland 1102703 Thermostat with a 1/4” x 7” tin/zinc bulb is used to control the temperature of other cooking equipment. Work temperature is between 100 F to 450F this thermostat makes certain that the cooking temperatures are standard to give the best results. It has a long-lasting 42” capillary and installation is made easier with front ears. The DPST switch is for AC operation and recommended for high-current applications such as Garland Grill Series models 36E, 684, 686, and E-24. The advantages are better energy utilization, dependable performance, and adaptability to the requirements of commercial kitchens to achieve uniformity in the food’s cooking process.

Dimensions

  • Length: 8.25 In
  • Width: 2.75 In
  • Height: 3 In
  • Weight: 0.79 lbs
https://partsfe.com/media/catalog/product/g/a/garland-1102703-griddle-thermostat-w-1-4-x-7-tin-zinc-bulb-100-f-450-f-55180-2.jpg

Product Notes

  • [ Type - D1/D18 ] [ Temp 100-450 ] [ Bulb 1/4" X 7"
  • Tin/Zinc ] [ Cap 42" ] [ Mount W/ Front Ears ]
  • [ Dial A3697, K-359, # 22-1395 ] And
  • [ Dial Insert A2683, # 22-1261 ]
  • Or
  • Dial # 22-1004 Off-450-100
  • Bezel # 26-4088
  • D1'D18 T'Stat, Dpst For Ac Operation, 4 Terminal
  • Used In Applications Requiring High Current.
  • Garland
  • Grill Series: 36E, 684, 686, E-24.
GARLAND:
Write Your Own Review
You're reviewing:Garland 1102703 Griddle Thermostat W/ 1/4" X 7" Tin/Zinc Bulb, 100°F-450°F
Your Rating
Customer Questions
What maintenance is required for the Garland 1102703 Thermostat?

Inspect the thermostat regularly to ensure accurate temperature control. Clean contacts and terminals to prevent buildup or corrosion. Check wiring for signs of wear or looseness. Routine maintenance supports maintaining secure, consistent griddle performance.

What are the common issues with the Garland 1102703 Thermostat?

  • Inaccurate temperature readings.
  • Griddle overheating or underheating.
  • Thermostat failing to connect or disconnect properly.
  • Loose or corroded electrical connections.

We strive to provide our customers with a hassle-free and efficient shopping experience. Our shipping policy ensures the timely delivery of your orders and complete customer satisfaction. View More

We are committed to ensuring your complete satisfaction with every purchase. We understand that circumstances may arise where you must return a product or request a refund. If for any reason you are not satisfied, you may return the item(s) according to the terms outlined below. View More

This Payment Policy outlines the terms and conditions governing all payments made for products purchased through our website. By making a purchase, you agree to be bound by this Payment Policy. View More

Installation Steps

Step1: Turn off the griddle and unplug it to prevent electrical shock.

Step2: Remove the control panel or access area to reach the old thermostat.

Step3: Disconnect the wiring and carefully remove the old thermostat.

Step4: Install the new thermostat in the same position securely.

Step5: Reconnect all wires according to the original layout.

Step6: Replace panels, restore power, and test the griddle for correct temperature operation.