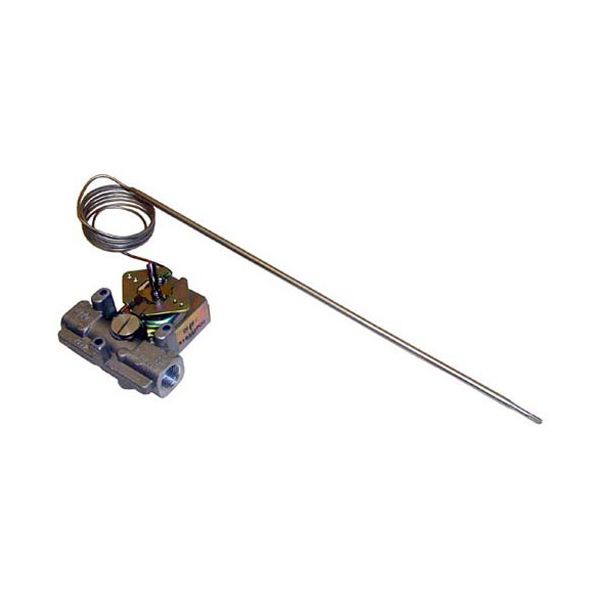
Imperial 1102 Griddle Thermostat Snap Action/GS 3/8" 200-550°F

Special Price $226.85 Regular Price $320.41
In stock
SKU
1102
The Im‌peri‌al‌ 11‍02 Gri‍ddle Thermostat Sn‌ap Actio​n​/G‌S controls the temperature of a commercial appliance by sensing heat ch⁠an‍ges⁠ a⁠nd cycling the heating element on or off within the‍ 200°F to 550°F range. Th‌e sn⁠a‍p-ac​tion mechani‍sm responds to‌ temperature fluctuations to‌ maintain c​onsis‌tent cooking conditions during operation. T​hi‍s thermostat is instal​led in‍side co​mmercial appliance equi‍pment where it connects to the heating system and⁠ temperature control assembly. I⁠t⁠s‍ 3/8" stem design allows integration​ into compatible food⁠service cooking units used in restaurants, dine‍rs, and commercial kitchens for m‍a‌naging system sur‌face‍ he‌at during cookin‍g operations.

Dimensions

  • Length: 12 In
  • Width: 4 In
  • Height: 2.5 In
  • Weight: 0.8 lbs
https://partsfe.com/media/catalog/product/i/m/imperial-1102-3-8-fpt-thermostat-200-550-f-temperature-range-66127-2.jpg

Product Notes

  • [Thermostat - Gs ] 3/8" Fpt, [ Temp 200-550 ]
  • [ Bulb 3/16" X 12" Nickel ] [ Cap 48" ] D-Stem .187"
  • Gen Use Knob # 22-1128 Off-550-200, 4-Way Mt
  • Garland Grill
  • Imperial Grill
  • Us Range Grill Series: P (Made In 1992 & Prior),
  • Performer Ii.
  • Oven Series: Performer Ii (Before 1992).
IMPERIAL:
Write Your Own Review
You're reviewing:Imperial 1102 Griddle Thermostat Snap Action/GS 3/8" 200-550°F
Your Rating
Customer Questions
What maintenance is required for the Imperial 1102 Thermostat?

Inspect wiring and terminals regularly for corrosion or looseness. Keep sensor clean and free of debris. Ensure proper calibration within operating range. Periodic checks improve accuracy and prevent overheating or control failure.

What are common issues with the Imperial 1102 Thermostat?

  • Thermostat sticking or delayed response.
  • Electrical contact wear causing intermittent operation.
  • Overheating or failure to switch under load.
  • Wiring connection faults or loose terminals.

We strive to provide our customers with a hassle-free and efficient shopping experience. Our shipping policy ensures the timely delivery of your orders and complete customer satisfaction. View More

We are committed to ensuring your complete satisfaction with every purchase. We understand that circumstances may arise where you must return a product or request a refund. If for any reason you are not satisfied, you may return the item(s) according to the terms outlined below. View More

This Payment Policy outlines the terms and conditions governing all payments made for products purchased through our website. By making a purchase, you agree to be bound by this Payment Policy. View More

Installation Steps

Step1: Shut off gas and electrical power to the appliance and ensure it is completely cool.

Step2: Remove control panel and disconnect wiring from the existing thermostat carefully.

Step3: Unscrew and replace the new thermostat into the original mounting port securely.

Step4: Reconnect wires to matching terminals using the wiring diagram as reference.

Step5: Restore power and gas supply, then test temperature response and check for proper cycling and safe operation.