Star Mfg 2T-Y2313 Oven SA Thermostat W/ 3/8" X 4-1/2 Nickel Bulb & Knob

Special Price $143.35 Regular Price $202.46
In stock
SKU
2T-Y2313
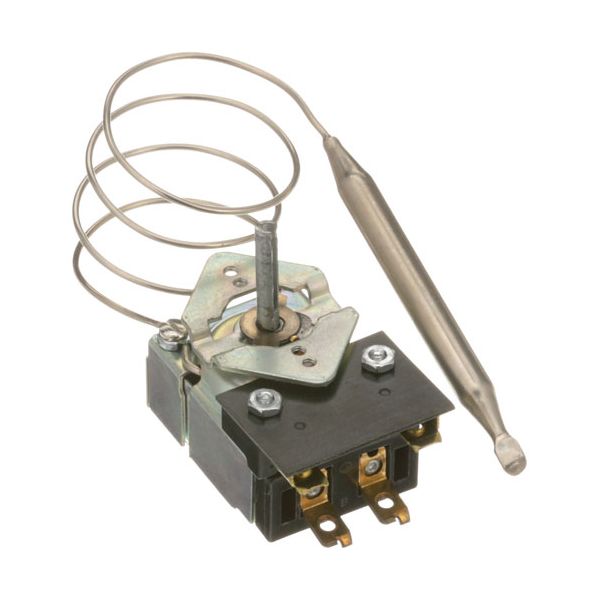
The Star Mfg 2T-Y2313 Thermostat 150° F -450°F is a temperature controller in commercial cooking equipment. It controls heating components to ensure that they have the right temperatures to ensure that they perform at the same level. It is installed in ovens, fryers and other appliances and monitors and regulates the interior temperature within the range set. It regulates the amount of heat produced and key to the safety and efficiency of the appliance, avoiding overheating and helping proper cooking results.

Dimensions

  • Length: 7.25 In
  • Width: 2.25 In
  • Height: 2.5 In
  • Weight: 0.6 lbs
https://partsfe.com/media/catalog/product/s/t/star-mfg-2t-y2313-oven-sa-thermostat-w-3-8-x-4-1-2-nickel-bulb-knob-96857-2.jpg

Product Notes

  • Thermostat,
  • [ Type - Sa ] [ Temp 150-450 ] Bulb: 3/8" X 4-1/2" Nickel
  • [ Cap 24" ] Temp Range: 150-450~
  • Star Knob # 22-1168 Off-450-150 ](Flat Up)
  • Star Grill 9Sg, 154, 156, 158, 351, 352,
  • Star Knob, # 22-1169 [ 2-1/2" Dia ] [ Off-450-150] (Flat
  • Right)
  • Star Grill Elec: 515(Tg,Tga),
  • 524(Chsa,Tg,Tga), 536(Chsa,Tg,Tga), 548(Chsa,Tg,Tga).
STERO:
STA2T-Y2313, STAY2313
U-LINE:
5300-174, 5300-17D, SA179-24
Write Your Own Review
You're reviewing:Star Mfg 2T-Y2313 Oven SA Thermostat W/ 3/8" X 4-1/2 Nickel Bulb & Knob
Your Rating
Customer Questions
What maintenance is required for the Star Mfg 2T-Y2313 Thermostat?

Periodically inspect the thermostat sensor and dial mechanism for grease, dust, or corrosion. Ensure wiring terminals are tight. Always disconnect power before servicing. Keeping the thermostat clean support maintain accurate oven temperatures and prevents overheating.

What are common issues with the Star Mfg 2T-Y2313 Thermostat?

  • Oven may overheat or underheat due to sensor misalignment.
  • Electrical terminals can corrode or loosen, causing intermittent operation.
  • The mechanical dial may stick, preventing proper adjustment.
  • Temperature swings during baking due to calibration drift.

We strive to provide our customers with a hassle-free and efficient shopping experience. Our shipping policy ensures the timely delivery of your orders and complete customer satisfaction. View More

We are committed to ensuring your complete satisfaction with every purchase. We understand that circumstances may arise where you must return a product or request a refund. If for any reason you are not satisfied, you may return the item(s) according to the terms outlined below. View More

This Payment Policy outlines the terms and conditions governing all payments made for products purchased through our website. By making a purchase, you agree to be bound by this Payment Policy. View More

Installation Steps

Step1: Turn off power and shut off the gas.

Step2: Remove control knobs and front panel.

Step3: Disconnect wires and sensing bulb from the old thermostat.

Step4: Mount the new thermostat in the same position and reconnect wires.

Step5: Replace panel and knobs, restore power and gas, and test temperature.