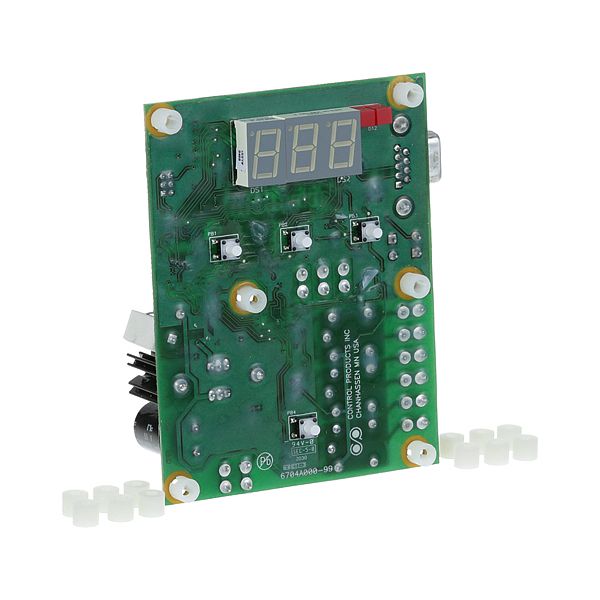
Hatco 02.01.189.00 Control Board Kit

Special Price $258.91 Regular Price $279.00
In stock
SKU
02.01.189.00
The Hatco 02.01.189.00 Control Board Kit is a replacement board that operates through user input sensors or interfaces and sends power to the heating or mechanical systems. It takes signals to regulate temperature, timing or other systems. This control board kit is mounted within compatible equipment, which is usually mounted in the main control compartment. It is linked to the wiring harnesses, relays, and sensors to coordinate the operation. The kit replaces or upgrades the control board that is currently in use to enhance the operation of the system.

Dimensions

  • Length: 6 In
  • Width: 5 In
  • Height: 2 In
  • Weight: 0.334 lbs
https://partsfe.com/media/catalog/product/h/a/hatco-02-01-189-00-control-board-kit-90892-2.jpg

Product Notes

  • Color: Green
  • Material: Plastic
  • Length: 4 3/4" | 121 mm
  • Width: 3 5/8" | 92 mm
  • Voltage: 24 V Ac
  • Includes: 12 Standoffs
  • Instructions Included: Y
Write Your Own Review
You're reviewing:Hatco 02.01.189.00 Control Board Kit
Your Rating
Customer Questions
What maintenance is required for the Hatco 02.01.189.00 Control Board Kit?

Inspect for loose connections and signs of moisture or corrosion inside the control board housing, and keep terminals tight and dust-free for accurate operation. Periodically test electrical continuity and stable voltage supply. Always disconnect power before servicing.

What are common issues with the Hatco 02.01.189.00 Control Board Kit?

  • Intermittent power loss.
  • Relay failure or switching errors.
  • Overheating due to electrical faults.
  • Unresponsive control signals.
  • Corrosion on terminals causing poor connectivity.
  • Blown fuse on control circuit.

We strive to provide our customers with a hassle-free and efficient shopping experience. Our shipping policy ensures the timely delivery of your orders and complete customer satisfaction. View More

We are committed to ensuring your complete satisfaction with every purchase. We understand that circumstances may arise where you must return a product or request a refund. If for any reason you are not satisfied, you may return the item(s) according to the terms outlined below. View More

This Payment Policy outlines the terms and conditions governing all payments made for products purchased through our website. By making a purchase, you agree to be bound by this Payment Policy. View More

Installation Steps

Step1: Turn off and unplug the unit to prevent electrical shock.

Step2: Remove the access panel using appropriate tools.

Step3: Locate and disconnect wires from the old control board.

Step4: Unscrew and carefully remove the existing board.

Step5: Mount the new control board securely in place.

Step6: Reconnect wires according to labels or diagram.

Step7: Reattach the panel, restore power, and test functionality.