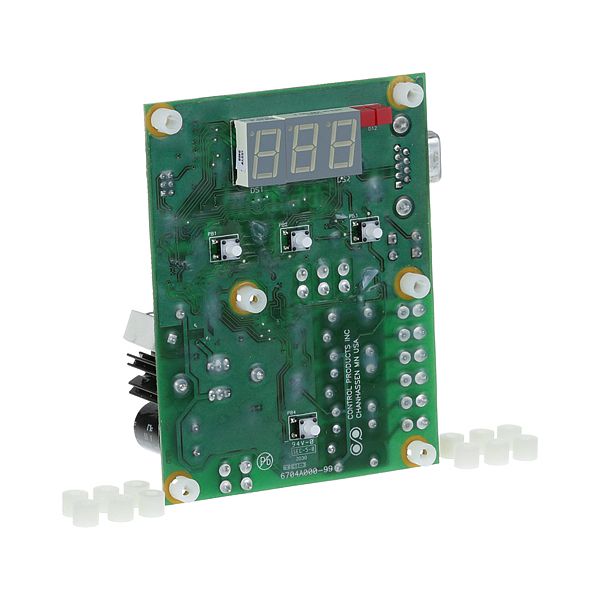
Hatco HT02-01-189 Control Board Kit

Special Price $258.91 Regular Price $279.00
In stock
SKU
HT02-01-189
The Hatco HT02-01-189 Control Board Kit helps keep food service equipment running smoothly and allows technicians to fix it when needed. This kit lets you control food temperatures exactly, food safe. The kit works with specific voltage inputs and can power heating units. The kit helps keep equipment working well, saves money by avoiding downtime, and makes sure food stays safe and tastes the same every time. The kit helps people who fix and maintain Hatco warmers, and toaster appliances to replace or fix broken control boards.

Dimensions

  • Length: 6 In
  • Width: 5 In
  • Height: 2 In
  • Weight: 0.334 lbs
https://partsfe.com/media/catalog/product/h/a/hatco-ht02-01-189-control-board-kit-24808.jpg

Product Notes

  • Color: Green
  • Material: Plastic
  • Length: 4 3/4" | 121 mm
  • Width: 3 5/8" | 92 mm
  • Voltage: 24 V Ac
  • Includes: 12 Standoffs
  • Instructions Included: Y
Write Your Own Review
You're reviewing:Hatco HT02-01-189 Control Board Kit
Your Rating
Customer Questions
What maintenance is required for the Hatco HT02-01-189 Control Board Kit?

Regularly inspect the control board kit for dust and loose connections to ensure reliable operation. Clean components to prevent overheating and signal faults. Always disconnect power before servicing to avoid electrical hazards. Routine checks improve performance and safety.

What are common issues with the Hatco HT02-01-189 Control Board Kit?

  • No power or failure to start.
  • Intermittent control signal loss.
  • Overheating of circuit components.
  • Relay or switching malfunction.
  • Error codes or unstable operation.

We strive to provide our customers with a hassle-free and efficient shopping experience. Our shipping policy ensures the timely delivery of your orders and complete customer satisfaction. View More

We are committed to ensuring your complete satisfaction with every purchase. We understand that circumstances may arise where you must return a product or request a refund. If for any reason you are not satisfied, you may return the item(s) according to the terms outlined below. View More

This Payment Policy outlines the terms and conditions governing all payments made for products purchased through our website. By making a purchase, you agree to be bound by this Payment Policy. View More

Installation Steps

Step1: Disconnect power supply to avoid electrical shock.

Step2: Open the unit’s access panel using appropriate tools.

Step3: Locate and carefully remove the existing control board.

Step4: Disconnect wiring, noting positions for reconnection.

Step5: Install the new control board and secure it properly.

Step6: Reconnect all wires firmly to matching terminals.

Step7: Close the panel, restore power, and test functionality.