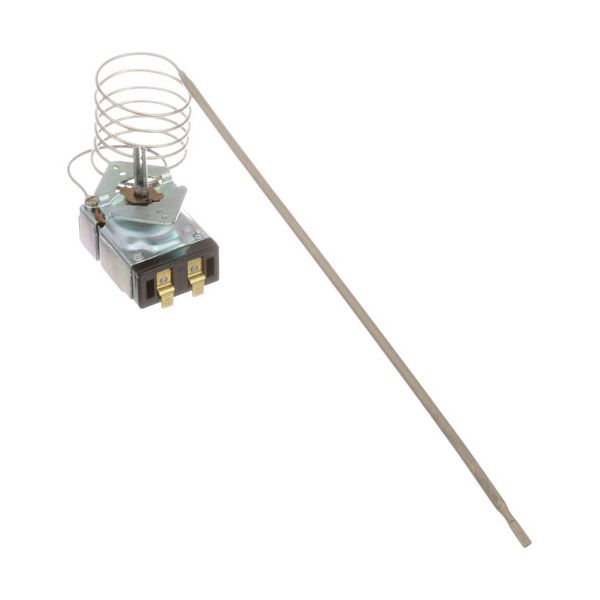
Blodgett 05279 Oven KX Thermostat 3/16" X 11-5/8" Bulb 36" cap
Special Price $108.04 Regular Price $212.94
In stock
SKU
05279
Manufacturer:

Blodgett 05279 KX Thermostat is a temperature control device for commercial ovens especially the range. The bulb is 3/16" x 11-5/8" and the capillary tube is 36" and the thermostat operates by sensing the temperature in the oven chamber and comparing it to the setpoint temperature. When the set point of when the oven temperature falls below, electrical circuit closes the thermostat thus turn the heating elements. Thermostat will open the circuit and kill power supply to the heating elements when temperature is better than the setpoint.
Dimensions
- Length: 12.25 In
- Width: 2.25 In
- Height: 2.5 In
- Weight: 0.5 lbs
Product Notes
- [Kx ][ Temp 140-550 F ] [ Bulb 3/16" X 11-5/8" ]
- [Cap 36"] [.187" ]
- Some Models Use # 22-1216 Dial (11224)Off-550-200
- # 22-1065 Dial (16393) Off-500-200.
- Later Models After Sep '86 Use Knob With Pointer # 22-1106
- Blodgett Oven 1200 Pizza Ovens, Ef/Eze, Re.
- Oven Ctb & Ctbr (Prior To 9-15-86), Dfg (Prior To 7-1-87),
- Mark V (Prior To 9-1-86), Mark V (Prior To 9-1-86),
- Series:Zephaire E & G W/Mech Controls,Sh1G, Series: Sho.
- Garland Oven Series: 680 (Elec).