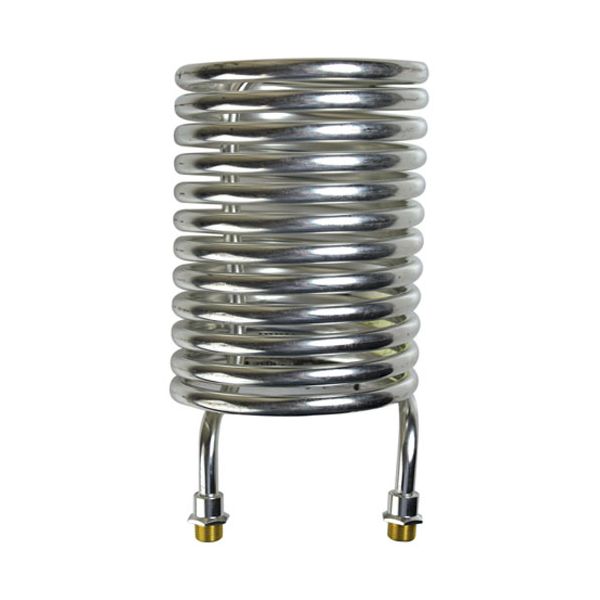
Bunn 12689-1 Hot Water Coil Kit

Special Price $94.00 Regular Price $178.40
In stock
SKU
12689-1
The Bunn 12689-1 Hot Water Coil Kit circulates the water through a coiled heating element to enable it to attain high temperatures to prepare beverages. The water circulates in the coil and maintains a constant exchange of heat before it moves to the system that is connected to it. The kit can be installed in compatible brewing equipment and fits in the designated compartment and can easily be integrated with the existing components to allow a steady supply of hot water to be delivered to the various applications.

Dimensions

  • Length: 9.5 In
  • Width: 4.375 In
  • Height: 9 In
  • Weight: 2 lbs
https://partsfe.com/media/catalog/product/b/u/bunn-12689-1-hot-water-coil-kit-17361-2.jpg

Product Notes

  • Tank Hot Water Coil Kit, Nickel Plated.
  • 4.92" Dia. Od
  • Coil Body 6-1/2" Long
  • Overall Length 9"
  • Fittings Threaded Inside & Out. 1/8" Fpt Id, 9/16"-24 Od.
  • Bunn C, Combo Brewer, Crtf5, Ct, Ctf, Cwaps, Cwaps-Mv, Cwt,
  • Cwt Twin, Cwt-Aps, Cwt-Cs, Cwtf, Cwtf Twin, Cwtf-Aps,
  • Cwtf-Cs, Cwtf-Mv, Cwtf-Tc, Cwtf-Twin, Cwtfa, Cwts, Cwts-Mv,
  • Cwtsr, Cwtsr-Mv, Gmb-Ps, Ot, Rt, Single Cw, Single Cwtf,
  • Tnt-3, Tntf-3, Tw, Twf, Twf-15, Twf-Ez, Twin-Aps, Twin-Tc
Write Your Own Review
You're reviewing:Bunn 12689-1 Hot Water Coil Kit
Your Rating
Customer Questions
What maintenance is required for the Bunn 12689-1 Hot Water Coil Kit?

Regularly inspect the hot water coil kit for mineral scale, corrosion, or leaks that could affect water heating performance. Follow the manufacturer's recommended descaling schedule to prevent buildup inside the coil. Check fittings and connections for signs of wear or leakage and ensure they remain secure. Always disconnect power and allow the equipment to cool before performing maintenance.

What are common issues with the Bunn 12689-1 Hot Water Coil Kit?

  • Reduced hot water output or slow recovery times.
  • Corrosion affecting coil performance.
  • Inconsistent water temperatures during operation.
  • Mineral scale buildup reducing heating efficiency.
  • Water leaks from damaged coil connections.

We strive to provide our customers with a hassle-free and efficient shopping experience. Our shipping policy ensures the timely delivery of your orders and complete customer satisfaction. View More

We are committed to ensuring your complete satisfaction with every purchase. We understand that circumstances may arise where you must return a product or request a refund. If for any reason you are not satisfied, you may return the item(s) according to the terms outlined below. View More

This Payment Policy outlines the terms and conditions governing all payments made for products purchased through our website. By making a purchase, you agree to be bound by this Payment Policy. View More

Installation Steps

Step1: Disconnect power and water supply allow unit to cool completely.

Step2: Remove outer panel to access the existing coil.

Step3: Carefully disconnect wiring and tubing from the old coil.

Step4: Remove mounting hardware and take out the old coil.

Step5: Install new coil, secure with hardware, and reconnect tubing/wiring.

Step6: Reassemble panel, restore power/water, and test for leaks and proper heating.