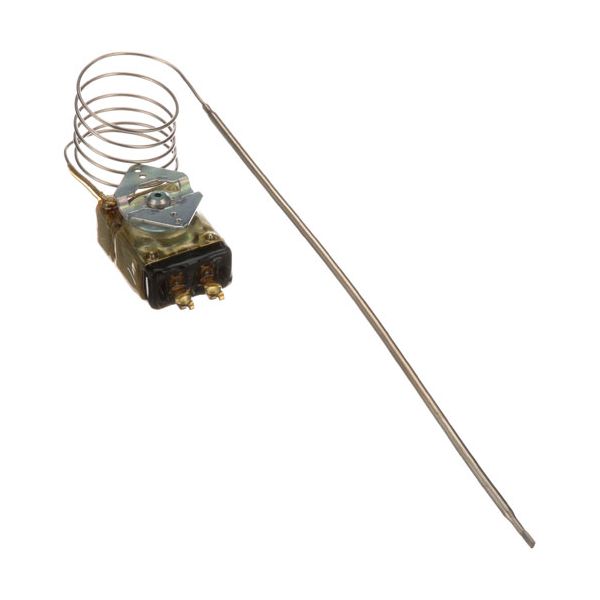
Groen 13481 Oven High Limit Thermostat KX Dip Sealed 550°F Fixed 3/16" Bulb

Special Price $110.79 Regular Price $187.78
In stock
SKU
13481
The Groen 13481 High Limit Thermostat KX is precise temperature control in cooking applications. It has a fixed temperature setting of 550°F and a 3/16" bulb, which cuts off power when the temperature gets beyond the preset limit. Dip-sealed thermostat for durability and reliability, long-lasting performance in high heat environments. This product is perfect for use in equipment such as Oven, providing greater safety, and preventing overheating and cooking conditions. Its robust design and high-temperature tolerance make it a must-have for commercial kitchen operations.

Dimensions

  • Length: 13 In
  • Width: 2.5 In
  • Height: 1.75 In
  • Weight: 0.6 lbs
https://partsfe.com/media/catalog/product/g/r/groen-13481-oven-high-limit-thermostat-kx-dip-sealed-550-f-fixed-3-16-bulb-67933-2.jpg

Product Notes

  • High Limt, Fixed Thermostat,
  • [ Kx Dip Sealed ] [ Temp 550 Fixed ]
  • [ Bulb 3/16" X 12-1/4" Nickel ] [ Cap 36" ] [ Mount 1 ]
  • [ No Dial ]
  • Groen Braising Pan Series: Chfp, Hfp, Nhfp.
U-LINE:
5300-786, 5300-78F, KX61-36
Write Your Own Review
You're reviewing:Groen 13481 Oven High Limit Thermostat KX Dip Sealed 550°F Fixed 3/16" Bulb
Your Rating
Customer Questions
What maintenance is required for the Groen 13481 Thermostat?

Inspect the bulb and capillary for damage or leakage. Keep electrical terminals tight and free from corrosion. Verify temperature cutoff function during scheduled oven safety checks. Avoid bending the sensing bulb to maintain accurate high-limit protection and accurate operation.

What are common issues with the Groen 13481 Thermostat?

  • Premature tripping is causing unexpected oven shutdowns during normal heating cycles.
  • Faulty or inaccurate cutoff due to sensor calibration drift.
  • Damaged or leaking capillary tube affecting temperature sensing.
  • Electrical contact failure leading to no heating or constant cutoff.

We strive to provide our customers with a hassle-free and efficient shopping experience. Our shipping policy ensures the timely delivery of your orders and complete customer satisfaction. View More

We are committed to ensuring your complete satisfaction with every purchase. We understand that circumstances may arise where you must return a product or request a refund. If for any reason you are not satisfied, you may return the item(s) according to the terms outlined below. View More

This Payment Policy outlines the terms and conditions governing all payments made for products purchased through our website. By making a purchase, you agree to be bound by this Payment Policy. View More

Installation Steps

Step1: Disconnect power and ensure oven is cool before starting.

Step2: Remove access panel carefully.

Step3: Note wiring and take a clear photo for reference.

Step4: Disconnect old thermostat and capillary bulb from mounting.

Step5: Insert new bulb into correct sensing tube position securely.

Step6: Mount thermostat securely to bracket.

Step7: Reconnect wiring per diagram or photo reference.

Step8: Restore panel and power, then test high-limit cutout operation.