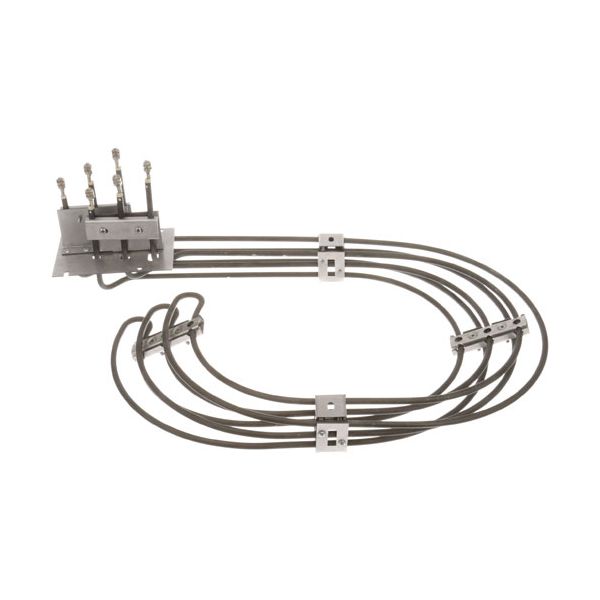
Duke 153643 Heating Element Assembly 10000W 240V

Special Price $243.41 Regular Price $488.00
In stock
SKU
153643
The Duke 153643 Heating Element Assembly is a 240-volt replacement part that supplies 10,000 watts to commercial cooking equipment. It transforms electrical energy into heat enabling the appliance to attain and sustain necessary operating temperatures. This is an aspect of foodservice use that aids in maintaining the stability of cooking efficiency under continuous use. Its place in the production depends on the stability of temperatures, recovery time, and the possibility of the appliance working in the vital conditions of the kitchen.

Dimensions

  • Length: 24 In
  • Width: 15 In
  • Height: 8 In
  • Weight: 5.5 lbs
https://partsfe.com/media/catalog/product/d/u/duke-153643-oven-element-assembly-w-screw-terminals-23-5-x-15-x-9-47410-2.jpg

Product Notes

  • Element Assembly
  • [ 240V 10000W 1 Ph ] [ 23.5" X 15" X 9" ]
  • [Terminals {Screw 10-32 }
  • Duke Oven
Write Your Own Review
You're reviewing:Duke 153643 Heating Element Assembly 10000W 240V
Your Rating
Customer Questions
What is the Best Electric Griddle?

Electric Griddle is an electronic equipment that uses an electric element as its heat source. It has a large cooking surface often made up of nonstick material. Electric Griddle has a surface which you do not find in the regular stovetop cookware. ...

What maintenance is required for the Duke 153643 Element Assembly W/ Screw Terminals?

Regularly inspect the oven element for signs of wear, corrosion, or damage. Keep terminals tight and free from grease buildup. Ensure proper electrical connections and avoid moisture exposure. Disconnect power before handling to prevent electrical hazards and ensure proper functioning.

What are common issues with the Duke 153643 Element Assembly W/ Screw Terminals?

  • Element not heating or uneven heating.
  • Burnt-out or broken heating coil.
  • Loose or faulty screw terminal connections.
  • Electrical short or intermittent power supply.
  • Visible damage such as cracks or warping.

We strive to provide our customers with a hassle-free and efficient shopping experience. Our shipping policy ensures the timely delivery of your orders and complete customer satisfaction. View More

We are committed to ensuring your complete satisfaction with every purchase. We understand that circumstances may arise where you must return a product or request a refund. If for any reason you are not satisfied, you may return the item(s) according to the terms outlined below. View More

This Payment Policy outlines the terms and conditions governing all payments made for products purchased through our website. By making a purchase, you agree to be bound by this Payment Policy. View More

Installation Steps

Step1: Disconnect power supply and ensure oven is completely cool for safety before starting always carefully.

Step2: Remove rear panel to access the old element carefully.

Step3: Detach screw terminals and note wiring positions before removal.

Step4: Install new element aligning screw terminals and secure firmly.

Step5: Reconnect wiring exactly as noted and tighten connections properly.

Step6: Reassemble panel, restore power, and test heating operation safely.