Duke 153930 Oven Element Assembly W/ Screw Terminals, 23.5" x 15" x 9"

Special Price $239.22 Regular Price $488.00
In stock
SKU
153930
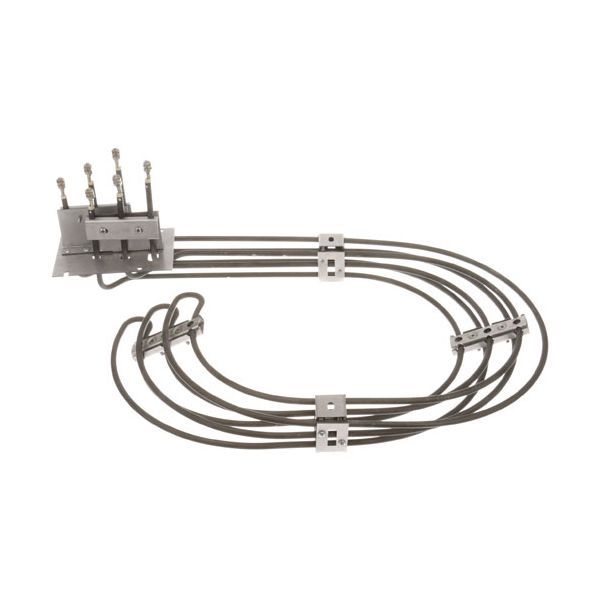
The Duke 153930 Element Assembly is a heating element specialized in ovens’ appliances. It measures 23.5” W x 15” D x 9” H and uses 240V and 10,000W for effective and fast heat output. It has screw terminals 10-32 for a secure connection to guarantee its functionality. This assembly can be recommended for use in baking products as well as cooking, since it does not lose heat frequently and improves efficiency. Ideal for restaurants or any food service company, it assists in managing precise temperatures which leads to better quality preparing.

Dimensions

  • Length: 24 In
  • Width: 15 In
  • Height: 8 In
  • Weight: 5.5 lbs
https://partsfe.com/media/catalog/product/d/u/duke-153930-oven-element-assembly-w-screw-terminals-23-5-x-15-x-9-79878-2.jpg

Product Notes

  • Element Assembly
  • [ 240V 10000W 1 Ph ] [ 23.5" X 15" X 9" ]
  • [Terminals {Screw 10-32 }
  • Duke Oven
Write Your Own Review
You're reviewing:Duke 153930 Oven Element Assembly W/ Screw Terminals, 23.5" x 15" x 9"
Your Rating
Customer Questions
What is the Best Electric Griddle?

Electric Griddle is an electronic equipment that uses an electric element as its heat source. It has a large cooking surface often made up of nonstick material. Electric Griddle has a surface which you do not find in the regular stovetop cookware. ...

What maintenance is required for the Duke 153930 Element Assembly?

Inspect heating element and screw terminals regularly for looseness, corrosion, or burn marks. Clean buildup carefully after power is disconnected. Tighten connections to ensure stable heating and prevent arcing. Regular checks improve performance and safety.

What are common issues with the Duke 153930 Element Assembly?

  • Loose screw terminal connections causing intermittent heating.
  • Element burnout or uneven heating across oven chamber.
  • Electrical arcing or shorting at connection points.
  • Overheating due to power fluctuations or poor installation.

We strive to provide our customers with a hassle-free and efficient shopping experience. Our shipping policy ensures the timely delivery of your orders and complete customer satisfaction. View More

We are committed to ensuring your complete satisfaction with every purchase. We understand that circumstances may arise where you must return a product or request a refund. If for any reason you are not satisfied, you may return the item(s) according to the terms outlined below. View More

This Payment Policy outlines the terms and conditions governing all payments made for products purchased through our website. By making a purchase, you agree to be bound by this Payment Policy. View More

Installation Steps

Step1: Disconnect power at breaker, ensure oven is cool.

Step2: Remove oven racks and rear access panel to access element.

Step3: Carefully unscrew and detach old element terminals.

Step4: Connect new element to screw terminals securely, matching wiring positions.

Step5: Refit panel and ensure wiring is insulated and clear, no pinching.

Step6: Restore power and test heating operation carefully after installation.