Jackson 170018 Dishwasher Thermostat

Special Price $131.58 Regular Price $185.85
In stock
SKU
170018
Manufacturer:
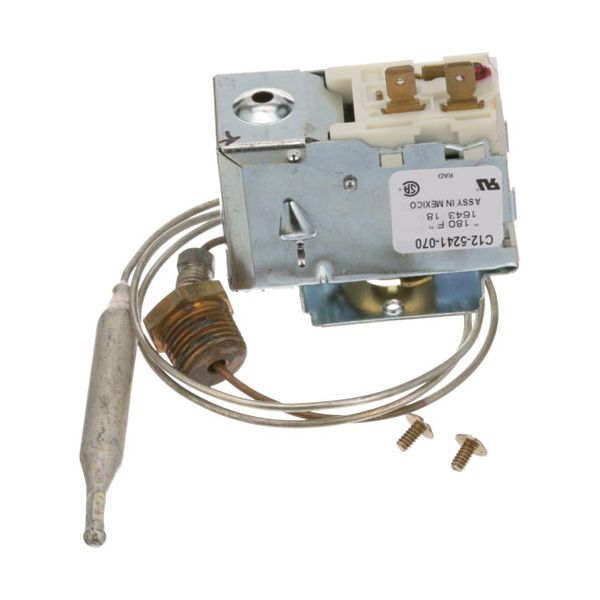
The Jackson 170018 Thermostat functions as a high-end temperature controller that serves dishwashers with 10AB, 10APRB, and 10U models. The Jackson 170018 Thermostat functions at its factory-set 180°F temperature range which users can adjust from 165°F to 195°F to precisely control water temperatures. This part features a 3/8" x 3-1/2" bulb together with 24" cap to maintain ideal cleaning conditions. Users can easily modify thermostat settings through screw driver slot and install the part using compact 3/8" stuff box design. Users obtain dependable performance and better energy efficiency together with improved dishwasher function through this product that achieves both cleanliness and power savings.

Dimensions

  • Length: 5 In
  • Width: 4 In
  • Height: 2.5 In
  • Weight: 0.5 lbs
https://partsfe.com/media/catalog/product/j/a/jackson-170018-dishwasher-thermostat-56934-2.jpg

Product Notes

  • [ Type Ranco - C12 ] [ Temp 180 Factory Set, Adj 165-195 ]
  • [ Bulb 3/8" X 3-1/2" ] [ Cap 24" ]
  • [ Size 3/8" Stuff Box ] [ Screw Driver Slot ] [ No Dial ]
  • Jackson Rinse T'Stat
  • Dishwasher 10Ab, 10Aprb, 10U
JACKSON:
05930-510-02-00, 170018, 1700R, 5930-510-02-00, 59305100200, JAC170018, JAC1700R, JAC5930-510-02-00
RANCO:
U-LINE:
C12-5241, C12-5241-000
Write Your Own Review
You're reviewing:Jackson 170018 Dishwasher Thermostat
Your Rating
Customer Questions
What maintenance is required for the Jackson 170018 Thermostat?

Inspect the thermostat regularly to ensure accurate temperature control in the dishwasher. Keep surrounding components clean and check wiring connections for securely. Test operation periodically and always disconnect power before performing any maintenance.

What are common issues with the Jackson 170018 Thermostat?

  • Inaccurate water temperature during wash cycles.
  • Thermostat failing to activate heating elements.
  • Overheating or insufficient heating issues.
  • Intermittent operation affecting performance.
  • Faulty wiring is causing inconsistent readings.

We strive to provide our customers with a hassle-free and efficient shopping experience. Our shipping policy ensures the timely delivery of your orders and complete customer satisfaction. View More

We are committed to ensuring your complete satisfaction with every purchase. We understand that circumstances may arise where you must return a product or request a refund. If for any reason you are not satisfied, you may return the item(s) according to the terms outlined below. View More

This Payment Policy outlines the terms and conditions governing all payments made for products purchased through our website. By making a purchase, you agree to be bound by this Payment Policy. View More

Installation Steps

Step1: Turn off power and allow the dishwasher to cool down.

Step2: Locate the thermostat near the heating or tank area.

Step3: Disconnect wiring and remove mounting screws.

Step4: Take out the old thermostat carefully.

Step5: Install the new thermostat in the exact position.

Step6: Reconnect wires according to original configuration.

Step7: Secure the unit firmly to ensure proper sensing.

Step8: Restore power and verify temperature regulation.