Garland 223242-43 Hood Orifice #43 3/8"-27 X 1/2" High

$3.82
In stock
SKU
223242-43
Manufacturer:
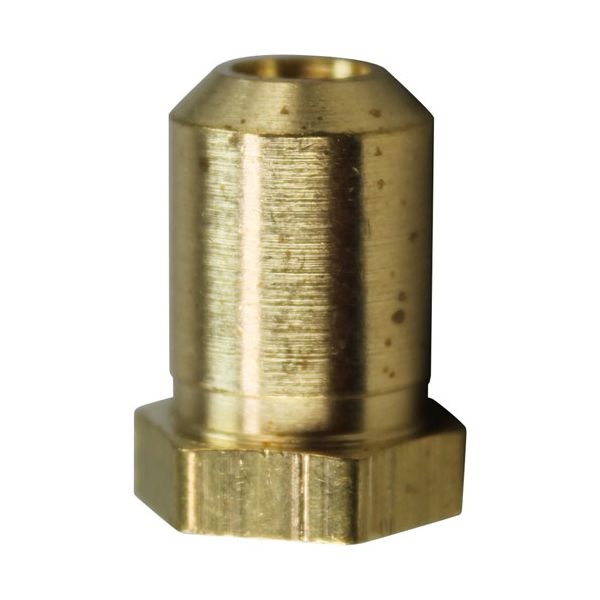
The Garland 223242-43 Hood Orifice #43 3/8"-27 x 1/2" High measures the flow of natural gas to a burner by providing an aperture of just the right size that restricts the flow of fuel prior to entering the combustion chamber. The gas flows through the calibrated hole in the orifice that regulates the correct combustion pressure. It is fitted in the gas train at the burner assembly of compatible cooking equipment where the 3/8"-27 inlet and 1/2"H in the system.

Dimensions

  • Length: 0.75 In
  • Width: 0.5 In
  • Height: 0.5 In
  • Weight: 0.01 lbs
https://partsfe.com/media/catalog/product/g/a/garland-223242-43-brass-hood-orfice-3-8-27-x-1-2-high-x-43-nat-55484-2.jpg

Product Notes

  • Brass Hood Orifice,
  • 3/8"-27 X 1/2" High X #43
  • Note: Orifice May Have #72 Stamped But Has Been Drilled To
  • The Proper Size
  • Jade Jcbh
  • Grill Jggt, Jggtb, Jgm, Jgt, Jgtb
Write Your Own Review
You're reviewing:Garland 223242-43 Hood Orifice #43 3/8"-27 X 1/2" High
Your Rating
Customer Questions
What is the Best Electric Griddle?

Electric Griddle is an electronic equipment that uses an electric element as its heat source. It has a large cooking surface often made up of nonstick material. Electric Griddle has a surface which you do not find in the regular stovetop cookware. ...

What maintenance is required for the Garland 223242-43 Orifice?

Clean the orifice carefully to prevent clogging from grease or debris buildup. Inspect for blockages or wear that may affect gas flow. Proper maintenance ensures accurate gas delivery and consistent burner performance.

What are the common issues with the Garland 223242-43 Orifice?

  • Clogged orifice restricting gas flow.
  • Inconsistent flame output.
  • Wear enlarging the orifice opening.
  • Improper gas pressure regulation.
  • Debris buildup is affecting performance.

We strive to provide our customers with a hassle-free and efficient shopping experience. Our shipping policy ensures the timely delivery of your orders and complete customer satisfaction. View More

We are committed to ensuring your complete satisfaction with every purchase. We understand that circumstances may arise where you must return a product or request a refund. If for any reason you are not satisfied, you may return the item(s) according to the terms outlined below. View More

This Payment Policy outlines the terms and conditions governing all payments made for products purchased through our website. By making a purchase, you agree to be bound by this Payment Policy. View More

Installation Steps

Step1: Turn off the gas supply completely before beginning.

Step2: Remove the existing orifice from the burner assembly carefully.

Step3: Clean the orifice port and surrounding area to remove debris.

Step4: Install the new orifice in the same orientation, ensuring it seats properly.

Step5: Reconnect any gas lines and secure fittings.

Step6: Restore gas supply slowly and test burner flame for proper operation.

Step7: Avoid open flames and ensure proper ventilation during installation.