ROYAL RANGE 2568 Griddle Signal Light 1/2" 1/3W 250V

$9.60
In stock
SKU
2568
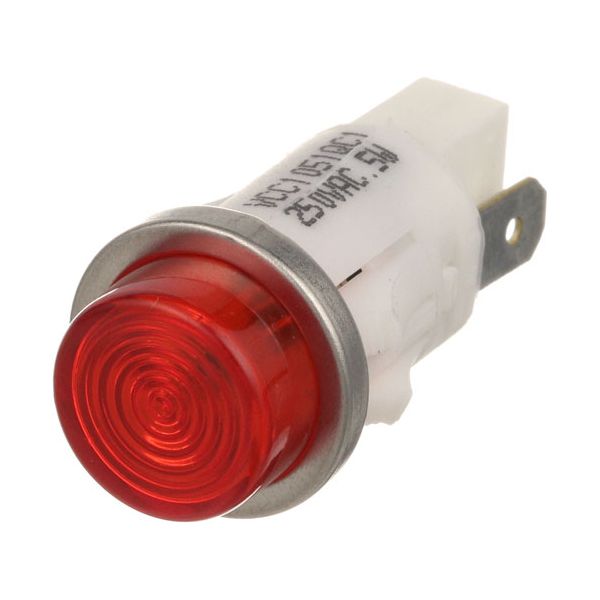
The ROYAL RANGE 2568 Griddle Signal Light operates by lighting up when electrical current passes through the internal element, indicating that the control circuit is active. It has a low power draw that ensures it is still lit when attached to the equipment wiring. It is mounted on the front control panel of commercial griddles, and it mounts through a 1/2" panel opening. It is intended to be operated at 250 volts and requires only some 1/3 watts to indicate electrical status without compromising the normal operation.

Dimensions

  • Length: 1.2 In
  • Width: 0.5 In
  • Height: 0.5 In
  • Weight: 0.1 lbs
https://partsfe.com/media/catalog/product/r/o/royal-range-2568-250v-1-3w-1-2-signal-light-63196-2.jpg

Product Notes

  • 250V 1/3W [ Hole 1/2"] [3/16" Tab Terminals] [Color Red]
  • Type Raised/Flat ][ Bezel Chrome] [ Fastener Lock Tabs]
  • ,Flat On Side
  • Alto-Shaam Food Warmers
  • Blodgett Oven Kco-25E, Mt2136(E & G) For Australia & The
  • Netherlands, Mt3855G, Mt3870. Series: Ctb (Cook Only)~
  • Zephaire E W/Mechaincal Controls.
  • Ge/Hobart Oven, Warmer, Fryer
  • Groen Cfpc, Fpc, Dee, Tdb, Oven 1001
  • Savory Toaster Pd-4.
  • Vulcan Grill
  • Winston Warmer Cd32T03Se1 (England & Germany).
More Information
Disable SaleableNo
ADCRAFT:
CROWN STEAM:
GENERAL ELECTRIC:
LINCOLN:
MARKET FORGE:
RANDELL:
EL LGT500, ELLGT500, PWSKELLGT500
ROYAL RANGE:
SAVORY:
SOUTHBEND:
Write Your Own Review
You're reviewing:ROYAL RANGE 2568 Griddle Signal Light 1/2" 1/3W 250V
Your Rating
Customer Questions
What maintenance is required for the ROYAL RANGE 2568 Signal Light?

Check the bulb or LED performance regularly. Clean the lens to ensure visibility. Inspect wiring for corrosion or loose connections. Proper control ensures accurate operation, clear signaling, and prevents unexpected equipment shutdowns.

What are common issues with the ROYAL RANGE 2568 Signal Light?

  • Burnt-out or flickering bulb/LED.
  • Loose electrical connections causing intermittent operation.
  • Dirty or obscured lens reducing visibility.
  • Wire corrosion leading to failure.
  • Incorrect voltage causing malperformance.

We strive to provide our customers with a hassle-free and efficient shopping experience. Our shipping policy ensures the timely delivery of your orders and complete customer satisfaction. View More

We are committed to ensuring your complete satisfaction with every purchase. We understand that circumstances may arise where you must return a product or request a refund. If for any reason you are not satisfied, you may return the item(s) according to the terms outlined below. View More

This Payment Policy outlines the terms and conditions governing all payments made for products purchased through our website. By making a purchase, you agree to be bound by this Payment Policy. View More

Installation Steps

Step1: Turn off power to the appliance before starting.

Step2: Remove the access panel to reach the signal light location.

Step3: Disconnect the wiring from the old signal light carefully.

Step4: Remove the old light from its mount.

Step5: Install the new signal light, aligning wires and securing the mount.

Step6: Reconnect wiring to matching terminals.

Step7: Replace the access panel, restore power, and test the light for proper operation.