Duke 2945-2 Dome Warmer Element with Female Terminals, 8-1/2" X 16-1/2", 750W

Special Price $50.29 Regular Price $87.92
In stock
SKU
2945-2

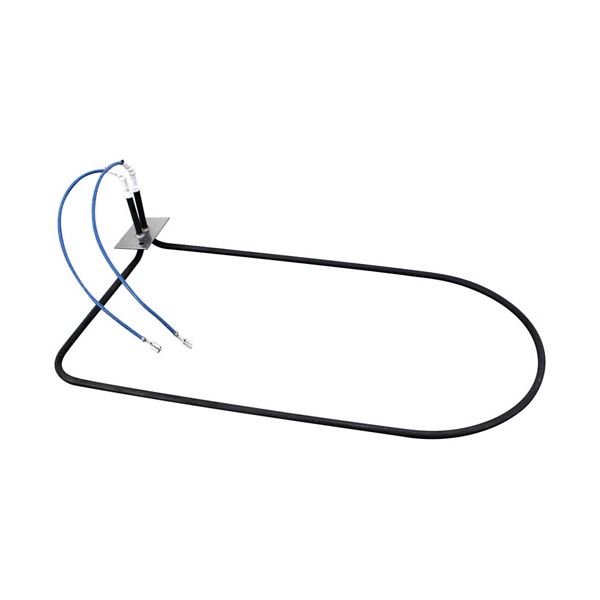
The Duke 2945-2 Dome Warmer Element with female terminals is a general-purpose heating solution for maintaining the temperature of the food. This element is 750W and 240V single phase with a dimension of 8-1/2” x 16-1/2” and comes with a dome-type element with corner wiring. It is Designed for Duke Heritage HB2/3/4/5/HF model, this model effectively maintains the temperature of food in a commercial kitchen. The element has a strong construction to provide reliability and the female terminals make it easy to connect. This is Perfect for warming stations, this element ensures the quality of the food.

Dimensions

  • Length: 17 In
  • Width: 8.5 In
  • Height: 5 In
  • Weight: 0.5 lbs
https://partsfe.com/media/catalog/product/d/u/duke-2945-2-dome-warmer-element-with-female-terminals-8-1-2-x-16-1-2-750w_1.jpg

Product Notes

  • Warmer Element, Dome Type, Corner Wired
  • [ 240V 750W 1Ph ] [ 8-1/2" X 16-1/2" ]
  • [Terminals {Female }
  • Duke Heritage Hb2/3/4/5/Hf
More Information
Disable SaleableNo
DUKE:
212945, 2405, 2405-2, 2945, 2945-2, DUK2405, DUK2405-2
Write Your Own Review
You're reviewing:Duke 2945-2 Dome Warmer Element with Female Terminals, 8-1/2" X 16-1/2", 750W
Your Rating
Customer Questions
What is the Best Electric Griddle?

Electric Griddle is an electronic equipment that uses an electric element as its heat source. It has a large cooking surface often made up of nonstick material. Electric Griddle has a surface which you do not find in the regular stovetop cookware. ...

What maintenance is required for the Duke 2945-2 Element?

Inspect the warmer element for buildup, discoloration, or damage. Clean gently to maintain heat efficiency. Ensure electrical connections are secure and dry. Avoid touching the element while powered and check regularly for consistent heating performance.

What are common issues with the Duke 2945-2 Element?

  • Element not heating evenly or at all.
  • Burn marks or discoloration on the surface.
  • Loose or damaged electrical connections.
  • Reduced heat output over time.
  • Short circuits causing intermittent operation.

We strive to provide our customers with a hassle-free and efficient shopping experience. Our shipping policy ensures the timely delivery of your orders and complete customer satisfaction. View More

We are committed to ensuring your complete satisfaction with every purchase. We understand that circumstances may arise where you must return a product or request a refund. If for any reason you are not satisfied, you may return the item(s) according to the terms outlined below. View More

This Payment Policy outlines the terms and conditions governing all payments made for products purchased through our website. By making a purchase, you agree to be bound by this Payment Policy. View More

Installation Steps

Step1: Turn off the power and allow the warmer to cool.

Step2: Remove screws or mounting hardware from the old element.

Step3: Disconnect wiring carefully.

Step4: Install the new element in the correct position.

Step5: Reconnect wiring and secure all mounting points.

Step6: Restore power and test the heating operation.

Step7: Ensure the element is properly seated and not touching metal surfaces.