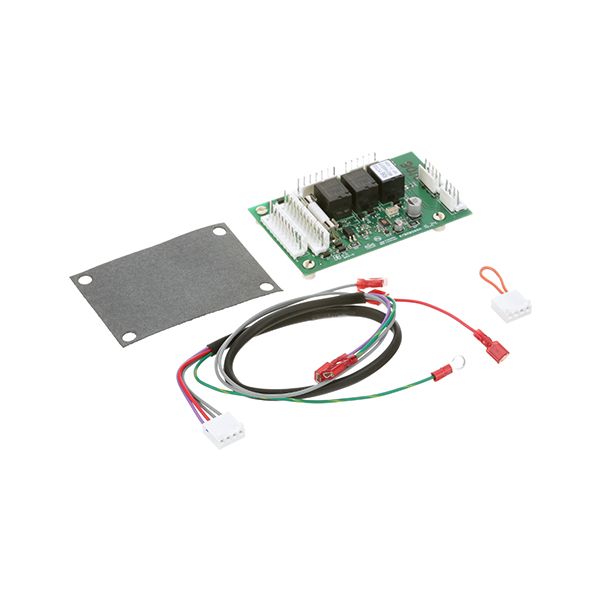
Pitco 60144001CL Relay Board Kit

Special Price $103.84 Regular Price $200.00
Out of stock
SKU
60144001CL
The Pitco 60144001CL Relay Board Kit is a control switch that takes regulates signals and routes power to culinary components connected to it. The chip activates and deactivates circuits using integrated relays depending on the input of the control system in the pan. It is mounted on the electrical operating compartment of the skillet on the appropriate bracket or panel. It facilitates communication between thermostats, timers, and heating elements in the operation. The kit is designed to be used in unit models that are compatible with one another, where coordinated equipment operations are required due to controlled power distribution.

Dimensions

  • Length: 5 In
  • Width: 3 In
  • Height: 1 In
  • Weight: 0 lbs
https://partsfe.com/media/catalog/product/p/i/pitco-60144001cl-relay-board-kit-w-wire-harness-and-connector-assembly-55583-2.jpg

Product Notes

  • Relay Board Kit W/Wire Harness And Connector Assy.
  • Units With Self Cleaning Burners
  • Pitco Fryer 4Ssh75Csfd, 5Ssh75Csfd, Fg-Sgh50-Fd-50-Bt-50-2,
  • Sg14, Sg14Di, Sg14R, Sg14Rdi, Sg14Rs, Sg14S-D, Sg14T,
  • Sg14Tdi, Sg18, Sg18Di, Sg18F, Sg18S, Sg18S-D, Sgc, Sgm1824,
  • Sgm24, Sgm34, Sgsebnb-14, Sgsebnb-18, Ssh55, Ssh60, Ssh75,
  • Ssh75Rs
Write Your Own Review
You're reviewing:Pitco 60144001CL Relay Board Kit
Your Rating
Customer Questions
What maintenance is required for the Pitco 60144001CL Relay Board Kit?

Inspect the relay board for dust buildup and signs of heat damage or corrosion. Ensure all wire harness connections remain tight and free from moisture. Periodically check for loose terminals or burnt contacts. Always disconnect power before servicing to avoid electrical shock.

What are common issues with the Pitco 60144001CL Relay Board Kit?

  • Intermittent appliancce operation due to loose or damaged wiring connections.
  • Relay failure causing heating or ignition control loss.
  • Burnt or overheated connectors from electrical overload.
  • Communication errors between control board and appliance components.

We strive to provide our customers with a hassle-free and efficient shopping experience. Our shipping policy ensures the timely delivery of your orders and complete customer satisfaction. View More

We are committed to ensuring your complete satisfaction with every purchase. We understand that circumstances may arise where you must return a product or request a refund. If for any reason you are not satisfied, you may return the item(s) according to the terms outlined below. View More

This Payment Policy outlines the terms and conditions governing all payments made for products purchased through our website. By making a purchase, you agree to be bound by this Payment Policy. View More

Installation Steps

Step1: Disconnect appliance power and gas/electric supply, verify zero voltage for safety.

Step2: Remove control panel cover to access relay board assembly.

Step3: Label and disconnect wiring harness from old board, then unscrew and remove it.

Step4: Install new relay board, secure mounting screws firmly.

Step5: Reconnect wire harness and connector assembly to matching terminals.

Step6: Restore power, test operation, and ensure better operation before use.