

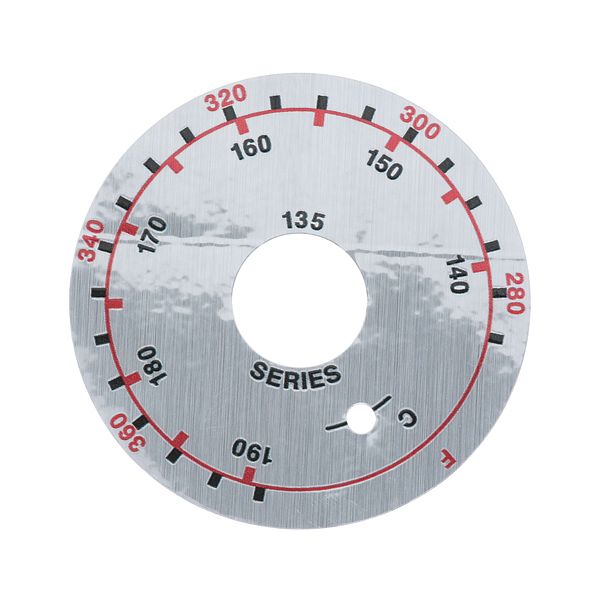
Frymaster 802-1470 Fryer Dial Plate

$38.16
In stock
SKU
802-1470
Manufacturer:

The Frymaster 802-1470 Dial Plate is a durable and precise replacement component designed for fryers. The dial plate makes cooking easy because it shows you exactly what temperature you need to set, helping your fryer work better. Made with strong materials, this dial plate resists high temperatures and daily kitchen use. The dial plate helps keep the fryer working well by controlling temperatures exactly, uses less power, and keeps the fryer running longer. It helps us keep our food fresh while keeping our kitchen running smoothly.

Dimensions

  • Length: 3.5 In
  • Width: 3.5 In
  • Height: 0.5 In
  • Weight: 0 lbs
https://partsfe.com/media/catalog/product/f/r/frymaster-802-1470-fryer-dial-plate-14162-2.jpg

Product Notes

  • Dial Plate
  • 280-360 F, 140-190 C
  • Frymaster Fm345E, Fm45, Fmcfe, Fmcfec, J3F, J65X, Jcfx,
  • Kj3Fc, Mj45, Mjcf, Mjcfe, Mjcfec
FRYMASTER:
Write Your Own Review
You're reviewing:Frymaster 802-1470 Fryer Dial Plate
Your Rating
Customer Questions
What maintenance is required for the Frymaster 802-1470 Dial Plate?

Keep the fryer dial plate clean and free from grease or debris to ensure accurate reading. Inspect markings for fading or damage and replace if unclear. Avoid chemicals that may degrade the printed surface during cleaning.

What are common issues with the Frymaster 802-1470 Dial Plate?

  • Faded or illegible markings affecting readability over time.
  • Cracking or surface wear from heat exposure.
  • Misalignment on control panel causing incorrect positioning.
  • Grease buildup obscuring readings and visibility.
  • Loose fit causing dial slipping during operation.

We strive to provide our customers with a hassle-free and efficient shopping experience. Our shipping policy ensures the timely delivery of your orders and complete customer satisfaction. View More

We are committed to ensuring your complete satisfaction with every purchase. We understand that circumstances may arise where you must return a product or request a refund. If for any reason you are not satisfied, you may return the item(s) according to the terms outlined below. View More

This Payment Policy outlines the terms and conditions governing all payments made for products purchased through our website. By making a purchase, you agree to be bound by this Payment Policy. View More

Installation Steps

Step1: Disconnect fryer from power and allow unit to cool completely.

Step2: Remove control knob and old dial plate carefully using proper screwdriver.

Step3: Align new dial plate with control panel markings and mounting points.

Step4: Secure plate using screws, ensuring firm but not overtightened fit.

Step5: Reinstall knob and restore power, checking calibration for safety.

Step6: Verify temperature control response before returning fryer to full operation.