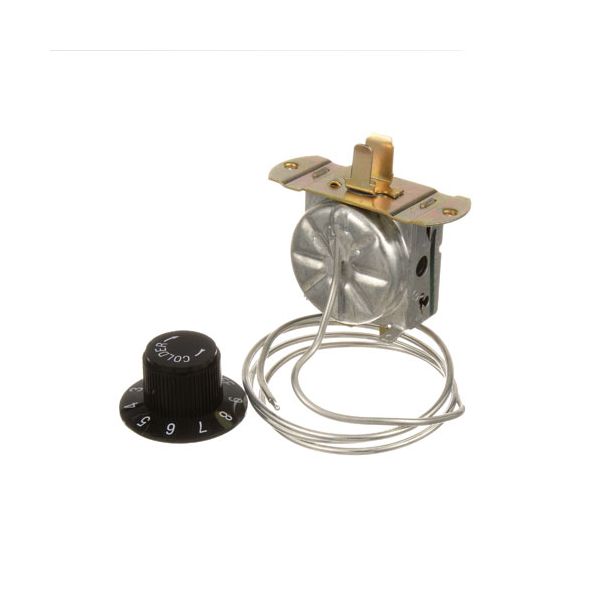
Ranco A10-4517 Temperature Control with Dial 30-1/2"

Special Price $59.80 Regular Price $97.00
In stock
SKU
A10-4517
The Ranco A10-4517 Temperature Control with Dial 30-1/2" works by using a vapor-filled capillary tube, which responds to the changes in temperature to either open or close internal electrical contacts. The sensing bulb is used to detect certain changes in temperature, and the internal bellows are used to either expand or contract and actuate the switch mechanism mechanically according to the set point of the dial. The integrated knob enables one to manually adjust the cycling range to ensure that the internal conditions remain constant during the cooling process.

Dimensions

  • Length: 6.3 In
  • Width: 1 In
  • Height: 2.5 In
  • Weight: 0.3 lbs
https://partsfe.com/media/catalog/product/r/a/ranco-a10-4517-30-cap-cooler-control-9530-12-47-5-f-temp-w-slot-stem-and-knob-57312-2.jpg

Product Notes

  • [ Type - 9530 ] [ Temp 12 To 47.5 F ] [ Cap 30" ]
  • Slot Stem And Knob
  • Bev Air Dw49, Dw64, Dw79, Dw94, Mt17, 18, 21, 27, 38, 45,
  • 49, Sv-27
BEVERAGE AIR:
502-125A, 502-139A, 502-194, 502-194A, BEV502-125A, BEV502-139A, BEV502-194, BEV502-194A
Write Your Own Review
You're reviewing:Ranco A10-4517 Temperature Control with Dial 30-1/2"
Your Rating
Customer Questions
What maintenance is required for the Ranco A10-4517 Cooler Control?

Inspect the capillary tube for kinks or damage and ensure proper placement for accurate sensing. Check knob operation and electrical connections regularly. Keep the control area clean and dry. Always disconnect power before servicing to prevent electrical hazards and ensure better handling.

What are common issues with the Ranco A10-4517 Cooler Control?

  • Inaccurate temperature regulation.
  • Cooler running continuously or not cycling.
  • Damaged or kinked capillary tube.
  • Faulty internal contacts.
  • Knob not adjusting temperature properly.
  • Delayed or inconsistent cooling response.

We strive to provide our customers with a hassle-free and efficient shopping experience. Our shipping policy ensures the timely delivery of your orders and complete customer satisfaction. View More

We are committed to ensuring your complete satisfaction with every purchase. We understand that circumstances may arise where you must return a product or request a refund. If for any reason you are not satisfied, you may return the item(s) according to the terms outlined below. View More

This Payment Policy outlines the terms and conditions governing all payments made for products purchased through our website. By making a purchase, you agree to be bound by this Payment Policy. View More

Installation Steps

Step1: Disconnect electrical power completely and confirm the refrigeration system is off before servicing.

Step2: Remove the control panel and note wiring connections from the existing thermostat.

Step3: Carefully detach the old control, including capillary tube and mounting stem.

Step4: Install the new into the panel opening, securing the slot stem and knob assembly firmly.

Step5: Route the properly into the sensing area without sharp bends or contact with hot surfaces.

Step6: Reconnect wiring to terminals, restore power, and test temperature range for correct cycling.