Garland 1613900 Oven Blower Wheel 10-3/4"D X 3-1/8"W 5/8"

Special Price $198.45 Regular Price $265.95
In stock
SKU
1613900
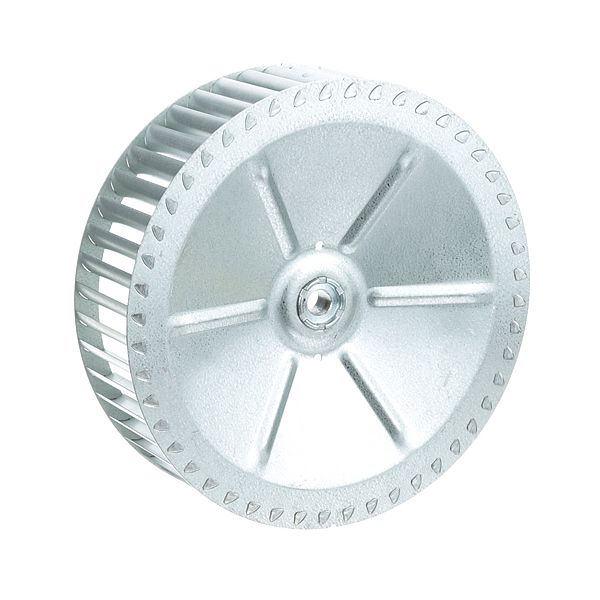
The Garland 1613900 Oven Blower Wheel is a spare part that assists in the distribution of warm air, to aid in the maintenance of consistent cooking functions. It has a diameter of 10-3/4", a width of 3-1/8", and a bore of 5/8" to fit certain oven models utilized in foodservice operations. This blower wheel is used in activities like restaurants, cafeteria and bakeries in the airflow system to circulate the air to the heating chamber to ensure that the temperature is even and the operation of the oven is stable in the normal cooking cycles.

Dimensions

  • Length: 10.75 In
  • Width: 10.75 In
  • Height: 3.125 In
  • Weight: 2.9 lbs
https://partsfe.com/media/catalog/product/g/a/garland-1613900-blower-wheel-ccw-10-3-4d-x-3-1-8w-5-8-81433-2.jpg

Product Notes

  • Blower Wheel,
  • [ 10-3/4"Dia ] X 3-1/8"W, 5/8" Hole, Concave Back,
  • Cw Rotation Looking From Back Of Wheel. Smooth Hub, 1 Set
  • Screw.
  • Garland Calls This Cw, No Puller Hub.
  • Garland
  • Oven E56Pb, E56Pt, G56-Pt
GARLAND:
Write Your Own Review
You're reviewing:Garland 1613900 Oven Blower Wheel 10-3/4"D X 3-1/8"W 5/8"
Your Rating
Customer Questions
What maintenance is required for the Garland 1613900 Blower Wheel?

Inspect the blower wheel regularly for grease and dust buildup, ensuring blades remain clean and balanced. Check mounting tightness and alignment to prevent vibration. Lubricate bearings if applicable and remove any obstructions to maintain smooth airflow and performance.

What are common issues with the Garland 1613900 Blower Wheel?

  • Blade imbalance causing excessive vibration and noise.
  • Worn bearings leading to rough operation or squealing sounds.
  • Dust or grease buildup reducing airflow efficiency.
  • Loose mounting causing instability during operation.
  • Unbalanced wheel causing uneven airflow.

We strive to provide our customers with a hassle-free and efficient shopping experience. Our shipping policy ensures the timely delivery of your orders and complete customer satisfaction. View More

We are committed to ensuring your complete satisfaction with every purchase. We understand that circumstances may arise where you must return a product or request a refund. If for any reason you are not satisfied, you may return the item(s) according to the terms outlined below. View More

This Payment Policy outlines the terms and conditions governing all payments made for products purchased through our website. By making a purchase, you agree to be bound by this Payment Policy. View More

Installation Steps

Step1: Disconnect power and allow the equipment to cool completely.

Step2: Remove the access panel to reach the blower assembly.

Step3: Loosen the set screw and slide out the damaged blower wheel.

Step4: Align the new blower wheel on the motor shaft with the correct rotation.

Step5: Tighten the set screw securely and ensure the wheel spins freely.

Step6: Reinstall the access panel, restore power, and test blower operation for smooth airflow.