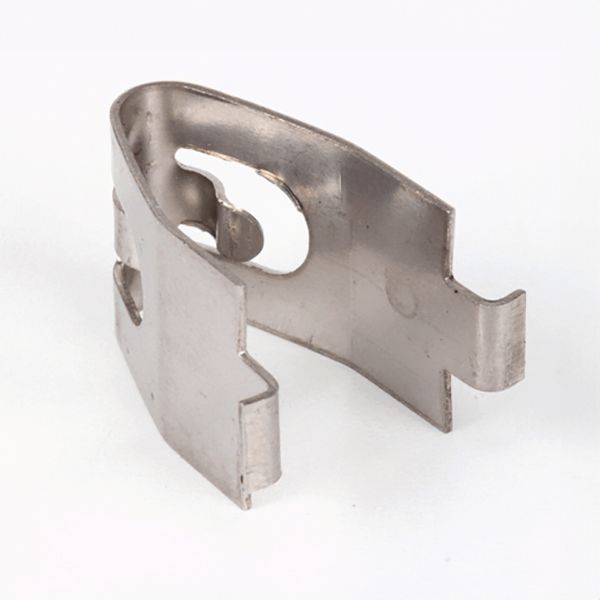
American Range A99740 Range Capillary/bulb Clamp

$10.72
In stock
SKU
A99740
The American Range A99740 Range Capillary/bulb Clamp to ensure the thermostat is in constant contact with the surface under monitoring. It operates by attaching the thin filter tube and bulb, which interferes with the temperature sensing. This is normally installed in the heating cavity or the inner wall where the control light is placed. It has two mounting tabs and is mounted with standard fasteners, which allows it to fit correctly in compatible cooker assemblies with an organized internal layout.

Dimensions

  • Length: 0.875 In
  • Width: 0.625 In
  • Height: 0.875 In
  • Weight: 0.1 lbs
https://partsfe.com/media/catalog/product/a/m/american-range-a99740-oven-capillary-bulb-clamp-w-2-tabs-54896-2.jpg

Product Notes

  • Capillary/Bulb Clamp, Mounts With 2 Tabs For Holes,
  • To Hold Bulb In Oven,
  • Montague 115(X, Z, S, A), 13P-1, 14P-1, 15P-1, 136, 25P-2,
  • Ek15A, G16, G26,
AMERICAN RANGE:
GARLAND:
IMPERIAL:
MONTAGUE:
Write Your Own Review
You're reviewing:American Range A99740 Range Capillary/bulb Clamp
Your Rating
Customer Questions
What maintenance is required for the American Range A99740 Capillary/bulb Clamp with Tabs?

Regularly inspect the clamp for looseness, corrosion, or deformation that may affect capillary bulb positioning. Ensure the tabs remain secure and properly aligned during servicing. Avoid bending the clamp during installation. Always turn off power before handling internal oven components.

What are common issues with the American Range A99740 Capillary/bulb Clamp with Tabs?

  • Clamp tabs bending or breaking due to improper handling.
  • Loose grip causing capillary bulb misalignment.
  • Corrosion from prolonged heat and moisture exposure.
  • Improper installation leading to temperature sensing errors.

We strive to provide our customers with a hassle-free and efficient shopping experience. Our shipping policy ensures the timely delivery of your orders and complete customer satisfaction. View More

We are committed to ensuring your complete satisfaction with every purchase. We understand that circumstances may arise where you must return a product or request a refund. If for any reason you are not satisfied, you may return the item(s) according to the terms outlined below. View More

This Payment Policy outlines the terms and conditions governing all payments made for products purchased through our website. By making a purchase, you agree to be bound by this Payment Policy. View More

Installation Steps

Step1: Turn off gas, power to the oven and allow components to cool completely.

Step2: Remove the oven panel to access the thermostat capillary bulb area.

Step3: Position the new clamp around the capillary bulb and align the two tabs with mounting holes.

Step4: Secure the clamp firmly with screws without pinching the bulb.

Step5: Reassemble panels, restore power and gas, and test oven temperature control.