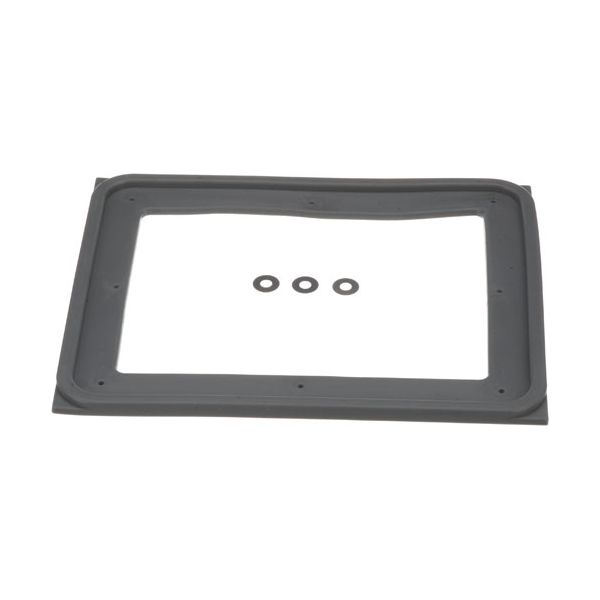
Vulcan Hart 00-857085-00001 Oven 3-Pan Door Gasket Kit, 11-7/8" X 14-7/8"
Special Price $183.69 Regular Price $283.04
In stock
SKU
00-857085-00001
Manufacturer:

The Vulcan Hart 00-857085-00001 3-Pan Door Gasket Kit is designed to create a tight seal for doors, enhancing cooking efficiency and heat retention. Measuring 11-7/8” x 14-7/8,” this gasket has a strong protrusion that reduces heat escape and guarantees even browning on your cakes, meats, and other baked goods. Looking good, especially for professional use in the kitchen, it manages to retain heat thereby increasing the durability of ovens. Specially designed for Vulcan ovens, this wear-resistant gasket is crucial in ensuring that ovens function efficiently and are low on maintenance for proper kitchen productivity.
Dimensions
- Length: 7.5 In
- Width: 6.5 In
- Height: 4 In
- Weight: 1.05 lbs
Product Notes
- Door Gasket Kit 3 Pan I, Rubber, Gray, 11-7/8" X 14-7/8"
- Fits Vulcan Hart Steamer Models~
- C24Ea, C24Ea10, C24Ea3, C24Ea3 Pro, C24Ea5, C24Ea5 Pro,
- C24Ea6, C24Eo3, C24Ga10, C24Ga6, Hc24Ea3, Hc24Ea5, Hc24Eo3,
- Hc24Eo5