
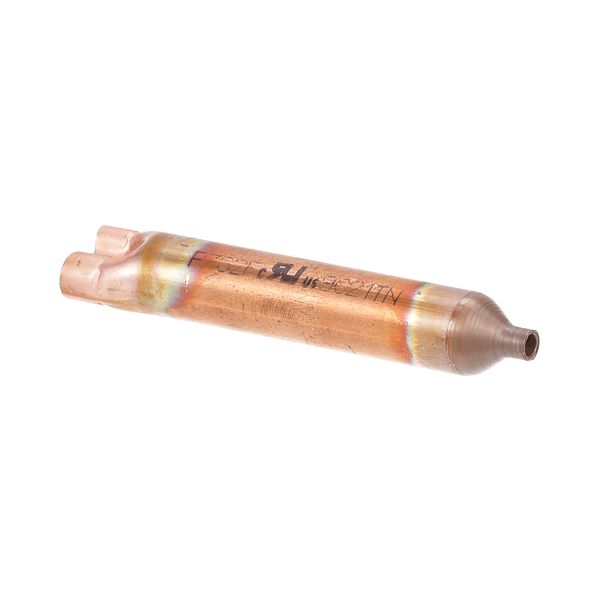
TRUE 800801 Filter Drier 1/4" & 3/8" Inlet 3/16" Outlet
Special Price $66.49 Regular Price $97.95
In stock
SKU
800801
Manufacturer:

The TRUE 800801 Filter Drier has a 1/4" & 3/8" inlet with an outlet of 3/16" through which the air can pass through a small filtration system that filters out moisture and contaminants. The larger inlet connections introduce air into the system, through the drying element, and out of the system through the smaller outlet and a controlled flow is maintained. It can be fitted in compressed air lines directly and is designed to be installed inline, so it is suitable to be used in setups where there is limited space and efficient installation is required.
Dimensions
- Length: 4.85 In
- Width: 0.9 In
- Height: 0.8 In
- Weight: 0.145 lbs
Product Notes
- Drier
- True Gdm-33, Gdm-47, T-23-2, T-24-Gc, T-36-Gc, T-49,
- Tbb-24-48, Tbb-4, Td-24-7, Td-50-18, Tssu-48-8-47,
- Tuc-67D-2, Twt-48, Twt-67F