Blodgett 56150 Oven Door Gasket Kit

Special Price $425.89 Regular Price $853.83
In stock
SKU
56150
Manufacturer:
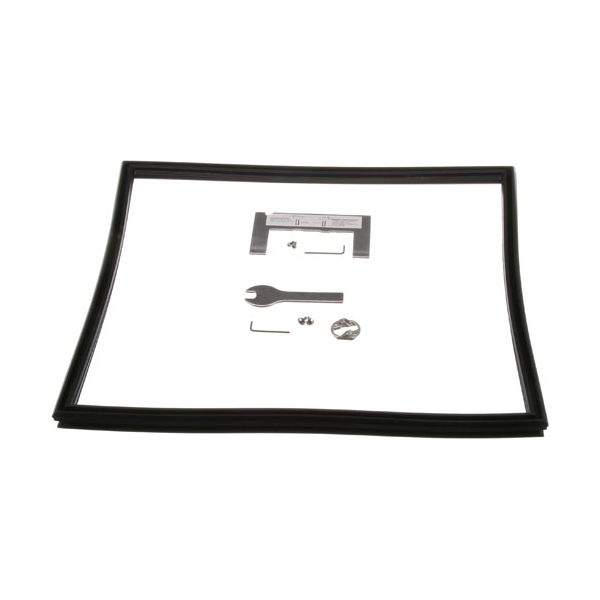
The Blodgett 56150 Door Gasket Kit is a replacement part for the XCEL-50EC oven, providing for optimal performance and energy efficiency. This 20" x 22" gasket, handle cam, needed screws, and tools for simple installation. It’s a gasket that seals the oven door, prevents heat loss, and helps keep your cooking temperatures consistent. It is easy to install and included instructions make it accessible for those with little technical skill. The usefulness and performance of your oven to last through the time, making your cooking experience a lot more efficient.

Dimensions

  • Length: 3 In
  • Width: 6 In
  • Height: 20 In
  • Weight: 0 lbs
https://partsfe.com/media/catalog/product/b/l/blodgett-56150-oven-door-gasket-kit-48337-2.jpg

Product Notes

  • Gasket Kit,
  • Comes With Handle Cam~
  • Tools, Screws, And Instructions.
  • Gasket, 20" X 22"
  • Fits Blodgett Model Xcel-50Ec
BLODGETT:
Write Your Own Review
You're reviewing:Blodgett 56150 Oven Door Gasket Kit
Your Rating
Customer Questions
What maintenance is required for the Blodgett 56150 Door Gasket Kit?

Inspect the gasket regularly for wear, gaps, or compression that could allow heat to escape from the oven chamber. Clean the gasket and surrounding door surface with a damp cloth to remove grease and carbon buildup.

What are common issues with the Blodgett 56150 Door Gasket Kit?

  • Gasket hardening or cracking causing heat loss.
  • Poor door seal leading to temperature fluctuations.
  • Uneven cooking due to escaping heat.
  • Wear from frequent door opening and closing.
  • Steam leakage affecting baking consistency.

We strive to provide our customers with a hassle-free and efficient shopping experience. Our shipping policy ensures the timely delivery of your orders and complete customer satisfaction. View More

We are committed to ensuring your complete satisfaction with every purchase. We understand that circumstances may arise where you must return a product or request a refund. If for any reason you are not satisfied, you may return the item(s) according to the terms outlined below. View More

This Payment Policy outlines the terms and conditions governing all payments made for products purchased through our website. By making a purchase, you agree to be bound by this Payment Policy. View More

Installation Steps

Step1: Disconnect oven power and let door cool completely for safety. Remove old gasket and clean channel of debris.

Step2: Align new gasket starting at top center and press firmly into retaining channel.

Step3: Work around door evenly, ensuring no twists or gaps.

Step4: Trim excess and secure ends tightly at join point.

Step5: Restore power and test door seal for uniform closure before operation.