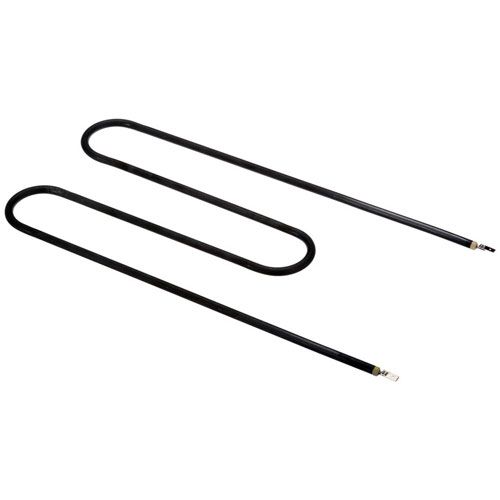
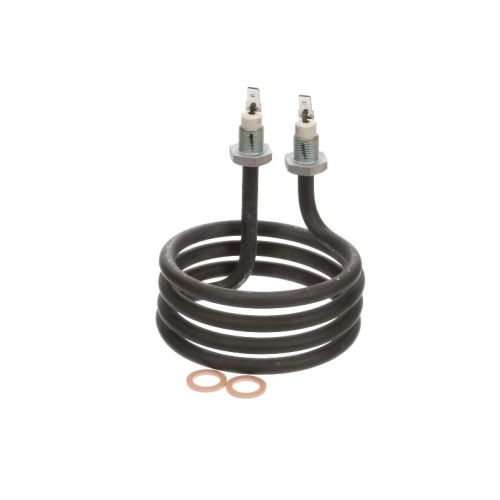
Groen 141183S HY-3E Steamer Heating Element 208V/8KW W/ 6 Screw Gascut Terminals
Special Price $508.72 Regular Price $877.10
In stock
SKU
141183S
Manufacturer:

The Groen 141183S HY-3E Steamer Heating Element is a powerful 208V, 8KW heating element designed for steamers. It guarantees safe and optimal regulation of LP gas construction of this valve is robust and will stand up to demanding environments. This sits best in commercial kitchens and food service equipment improving the efficiency of cooking appliances. The valve offers quick response times, integration into existing systems, reduces gas waste, improves fuel efficiency, and helps the safer operation of gas-powered equipment. LP gas compatibility and standard connection types for seamless installation are given.
Dimensions
- Length: 15.5 In
- Width: 3 In
- Height: 3 In
- Weight: 2.55 lbs
Product Notes
- Heating Element, 208V, 8Kw
- 14"Long From Base, With Gasket
- (6) Screw Terminals Gasket Only 321343
- Groen Steamer: Hy-3E