Moffat M020083 Convection Oven Bottom Hinge Assembly

Special Price $69.73 Regular Price $78.95
In stock
SKU
M020083
Manufacturer:
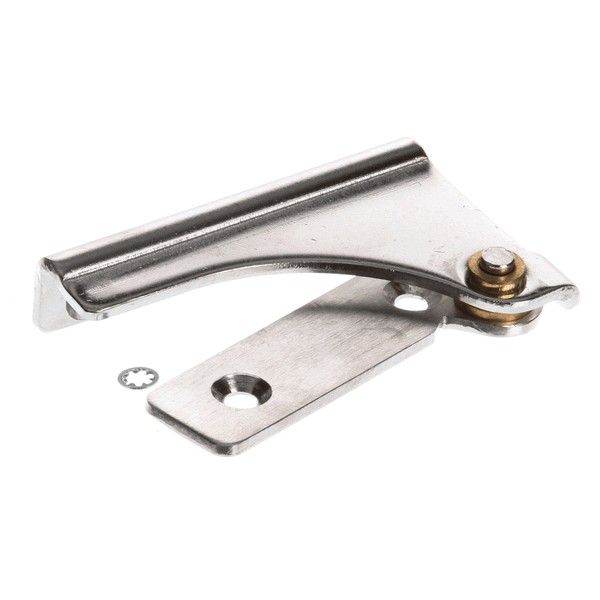
The Moffat M020083 Convection Oven Bottom Hinge Assembly enables a door to swing on a pivot by hinging in the bottom to allow the door to swing towards the left and right along its axis. The hinge facilitates the movement as the door is operated, whilst maintaining the alignment with the frame. This unit is attached to the lower side of the door of compatible ovens or cabinets and attached to the base of the unit and the door. It is designed to replace the hinge when it cannot assist in the movement of the door normally.

Dimensions

  • Length: 3.625 In
  • Width: 2 In
  • Height: 0.5 In
  • Weight: 0.26 lbs
https://partsfe.com/media/catalog/product/m/o/moffat-m020083-hinge-assembly-bottom-61045.jpg

Product Notes

  • Hinge Assembly, Bottom
  • For Replacement Bushing Use Ap# 8009359
  • Fits Moffat Models~
  • E32, E32M, E32Ms, E89M, E89Ms, G32, G32M, G32Ms
Write Your Own Review
You're reviewing:Moffat M020083 Convection Oven Bottom Hinge Assembly
Your Rating
Customer Questions
What maintenance is required for the Moffat M020083 Bottom Hinge Assembly?

Inspect hinge regularly for damage and looseness. Lubricate pivot points for smooth operation and reduced friction. Ensure screws remain tight and aligned to prevent door pressure. Clean debris and avoid moisture buildup for safe operation.

What are common issues with the Moffat M020083 Bottom Hinge Assembly?

  • Loose hinge causing door misalignment or poor sealing.
  • Stiff movement due to lack of lubrication or debris buildup.
  • Damage on pivot causing squeaking or uneven swing.
  • Corrosion affecting smooth operation and structural stability.

We strive to provide our customers with a hassle-free and efficient shopping experience. Our shipping policy ensures the timely delivery of your orders and complete customer satisfaction. View More

We are committed to ensuring your complete satisfaction with every purchase. We understand that circumstances may arise where you must return a product or request a refund. If for any reason you are not satisfied, you may return the item(s) according to the terms outlined below. View More

This Payment Policy outlines the terms and conditions governing all payments made for products purchased through our website. By making a purchase, you agree to be bound by this Payment Policy. View More

Installation Steps

Step1: Disconnect power and unload the door to prevent strain or injury.

Step2: Support the door and remove the old bottom hinge hardware.

Step3: Align the new hinge assembly with the mounting holes.

Step4: Secure using original screws and tighten firmly.

Step5: Reposition the door onto the hinge pin.

Step6: Test door swing and adjust alignment if needed.