
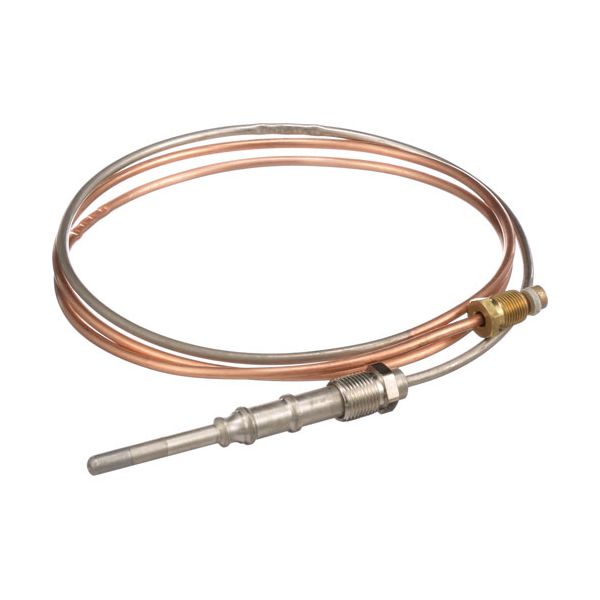
Johnson Controls K16RA-48H Coaxial Thermocouple 48" Thick Capillary Nickel Plated 11/32"-32 20-30mV

Special Price $64.33 Regular Price $83.54
In stock
SKU
K16RA-48H
Manufacturer:

The Johnson Controls K16RA-48H Coaxial Thermocouple is a component that produces a millivolt signal when it detects the heat at the point where two different metals are joined. The signal output varies between 20 and 30 millivolts depending on the temperature of the flame, to signal the safety control that the flame is present. This thermocouple is mounted at the burner assembly, the sensing tip is placed directly in the flame, and the threaded capillary is attached to the mounting bracket. It has a 48-inch coaxial lead, thick capillary construction, and an 11/32-32 threaded connection.

Dimensions

  • Length: 5 In
  • Width: 3.25 In
  • Height: 1 In
  • Weight: 0.3 lbs
https://partsfe.com/media/catalog/product/j/o/johnson-controls-k16ra-48h-coaxial-48-heavy-duty-thermocouple-w-thick-capillary-20-30-mv-11-32-32-threads-nickel-plated-95018.jpg

Product Notes

  • 48" Heavy Duty Coaxial Thermocouple, 20-30 Mv
  • With Thick Cappillary.
  • Coaxial Thermocouple Threads = 11/32"-32.
  • Johnson Controls K16Ra-48C
  • Nickel Plated
  • Blodgett Model?
Write Your Own Review
You're reviewing:Johnson Controls K16RA-48H Coaxial Thermocouple 48" Thick Capillary Nickel Plated 11/32"-32 20-30mV
Your Rating
Customer Questions
What maintenance is required for the Johnson Controls K16RA-48H Thermocouple?

Keep the thermocouple tip clean and free from carbon buildup to ensure accurate flame sensing. Inspect the capillary tube regularly for kinks, cracks, or heat damage. Ensure threaded connections remain tight and corrosion-free for stable signal transmission and better burner operation.

What are common issues with the Johnson Controls K16RA-48H Thermocouple?

  • Cracked or damaged capillary tube reducing sensing accuracy.
  • Corroded or loose threaded connections affecting continuity.
  • Carbon buildup on probe leading to false flame readings.
  • Intermittent pilot flame detection failures.
  • Overheating causing sensor degradation and unstable output.

We strive to provide our customers with a hassle-free and efficient shopping experience. Our shipping policy ensures the timely delivery of your orders and complete customer satisfaction. View More

We are committed to ensuring your complete satisfaction with every purchase. We understand that circumstances may arise where you must return a product or request a refund. If for any reason you are not satisfied, you may return the item(s) according to the terms outlined below. View More

This Payment Policy outlines the terms and conditions governing all payments made for products purchased through our website. By making a purchase, you agree to be bound by this Payment Policy. View More

Installation Steps

Step1: Shut off gas supply and allow unit to cool completely.

Step2: Disconnect old thermocouple from pilot and control valve.

Step3: Clean pilot assembly area before installing new unit.

Step4: Position new thermocouple tip directly in pilot flame.

Step5: Thread connector into valve and tighten lightly.

Step6: Route tubing away from heat sources and sharp edges.

Step7: Restore gas and test for stable pilot operation.