Bakers Pride M1098X Oven EGO Thermostat W/ Dial Knob Screws 1/8" X 10" Nickel Bulb 680 F TEMP 60" CAP

Special Price $330.46 Regular Price $828.22
In stock
SKU
M1098X
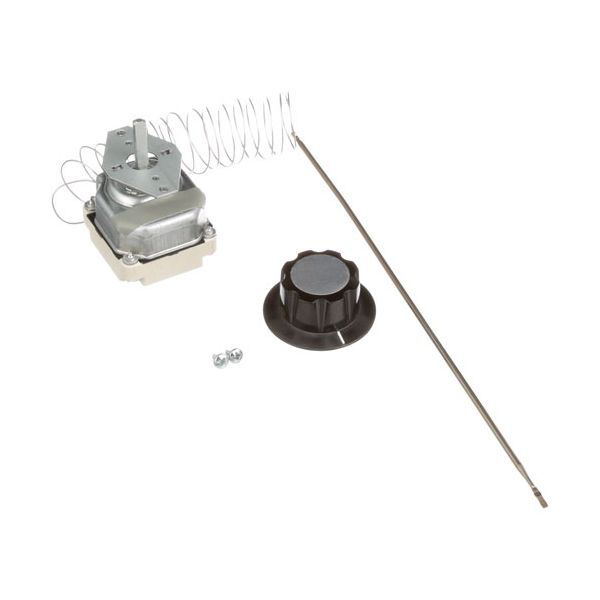
The Bakers Pride M1098X EGO Thermostat operates as a high-performance temperature control device specifically engineered to work with electric ovens including the DP-2, P-22BL, P-22S, and other models. The temperature control device has a durable 1/8" x 10" nickel bulb that uses a 60" capillary to reach temperatures up to 680°F. The thermostat comes with a D-stem 0.178" and vertical bracket to guarantee exact installation. The included dial knob 22-1106 enables this thermostat to provide precise heat control which results in better cooking consistency. The part operates perfectly for commercial applications by improving oven efficiency and delivering uniform baking results while extending equipment lifetime.

Dimensions

  • Length: 4.5 In
  • Width: 1.5 In
  • Height: 7 In
  • Weight: 0.5 lbs
https://partsfe.com/media/catalog/product/b/a/bakers-pride-m1098x-oven-ego-thermostat-w-dial-knob-screws-1-8-x-10-nickel-bulb-680-f-temp-60-cap-13574.jpg

Product Notes

  • Ego T'Stat W/ Dial, Max Temp 680 Deg F.
  • 1/8" X 10" Nickel Bulb, 60" Cap,
  • .178" D-Stem
  • 6Ea 1/4 Tabs,, Vert Bkt Flat Down
  • Comes W/ Knob Part #22-1106 (Indicator Knob W/Set Screw.)
  • Bakers Pride Electric Pizza Oven Dp-2, P-22Bl,
  • P-22S, P-24S, P-44Bl, P-44S, P-46S, P-48S, P18S, P24S
BAKERS PRIDE:
Write Your Own Review
You're reviewing:Bakers Pride M1098X Oven EGO Thermostat W/ Dial Knob Screws 1/8" X 10" Nickel Bulb 680 F TEMP 60" CAP
Your Rating
Customer Questions
What maintenance is required for the Bakers Pride M1098X Thermostat?

Periodically clean the oven thermostat to remove grease and debris that may affect performance. Verify the electrical connections are tight and free of corrosion. Test the temperature accuracy regularly, and always ensure power is off before handling to prevent shocks.

What are common issues with the Bakers Pride M1098X Thermostat?

  • Temperature fluctuations or drifting.
  • Oven overheating or underheating.
  • Thermostat switch is failing to connect.
  • Delayed response when adjusting settings.

We strive to provide our customers with a hassle-free and efficient shopping experience. Our shipping policy ensures the timely delivery of your orders and complete customer satisfaction. View More

We are committed to ensuring your complete satisfaction with every purchase. We understand that circumstances may arise where you must return a product or request a refund. If for any reason you are not satisfied, you may return the item(s) according to the terms outlined below. View More

This Payment Policy outlines the terms and conditions governing all payments made for products purchased through our website. By making a purchase, you agree to be bound by this Payment Policy. View More

Installation Steps

Step1: Turn off and unplug the oven to prevent electrical shock.

Step2: Remove the oven control panel to access the old thermostat.

Step3: Disconnect the wiring carefully and remove the old thermostat.

Step4: Clean the mounting area and ensure no debris remains.

Step5: Install the new thermostat and reconnect the wiring securely.

Step6: Reattach the control panel and plug in the oven.

Step7: Test the oven to confirm accurate temperature control.