Keating 009345 Griddle Rocker Switch SPST On/Off

Special Price $16.03 Regular Price $18.60
Out of stock
SKU
009345
Manufacturer:
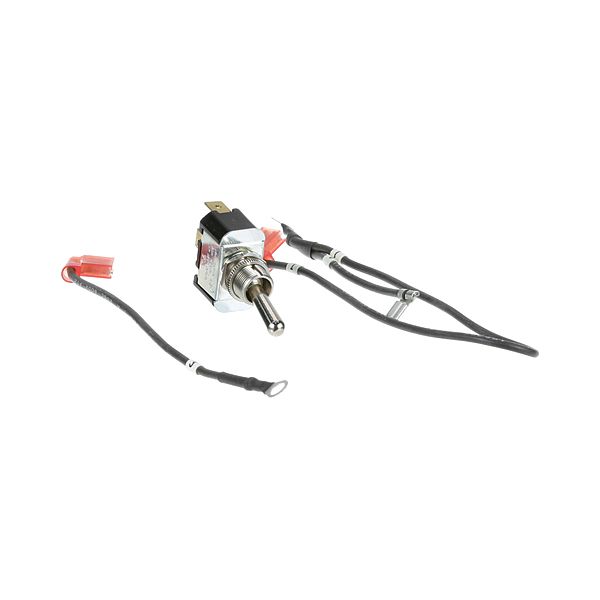
The Keating 009345 Rocker Switch is an on/off single-pole, single-throw control that is used to regulate the electrical power in commercial griddle systems. It is a direct user interface that enables operators to switch heating circuits on or off when cooking. The switch is installed in the equipment control panel, and assists in the control of the workflow by providing an unambiguous power status control in connection with the internal electrical assembly of the griddle. It aids in the startup and shutdown processes in the restaurant kitchen.

Dimensions

  • Length: 6 In
  • Width: 0.5 In
  • Height: 1.7 In
  • Weight: 0.2 lbs
https://partsfe.com/media/catalog/product/k/e/keating-009345-spst-red-lighted-rocker-switch-w-1-4-tabs-15-16-x-1-1-8-on-off-81566-2.jpg

Product Notes

  • Toggle Switch, 12A-250V, 20A-125V, W/Wire Leads
  • Fits 1/2" Hole,
  • Keating Griddle
KEATING:
-009345, 009345, 9345, KEA009345, KEA09345
Write Your Own Review
You're reviewing:Keating 009345 Griddle Rocker Switch SPST On/Off
Your Rating
Customer Questions
What maintenance is required for the Keating 009345 Rocker Switch?

Inspect the rocker switch regularly for dust, moisture, and loose terminal connections. Clean contacts gently with a dry cloth to ensure accurate operation. Ensure wiring remains tight and insulated to prevent short circuits and intermittent failure.

What are common issues with the Keating 009345 Rocker Switch?

  • Light indicator flickers or fails due to worn internal contacts.
  • Switch does not latch properly causing intermittent on/off action.
  • Loose tabs result in unstable electrical connection.
  • Overheating or power interruption under high load conditions.

We strive to provide our customers with a hassle-free and efficient shopping experience. Our shipping policy ensures the timely delivery of your orders and complete customer satisfaction. View More

We are committed to ensuring your complete satisfaction with every purchase. We understand that circumstances may arise where you must return a product or request a refund. If for any reason you are not satisfied, you may return the item(s) according to the terms outlined below. View More

This Payment Policy outlines the terms and conditions governing all payments made for products purchased through our website. By making a purchase, you agree to be bound by this Payment Policy. View More

Installation Steps

Step1: Disconnect power supply to avoid electric shock before installation during installation.

Step2: Cut panel opening to match switch dimensions and ensure snug fit.

Step3: Insert rocker switch into panel until it locks securely in place.

Step4: Attach wires to tabs according to circuit diagram.

Step5: Restore power and test On/Off operation; ensure proper illumination.

Step6: Keep hands dry and follow electrical safety precautions always.