Star Mfg E2-7757 Gas Fryer Orifice #51

$18.24
In stock
SKU
E2-7757
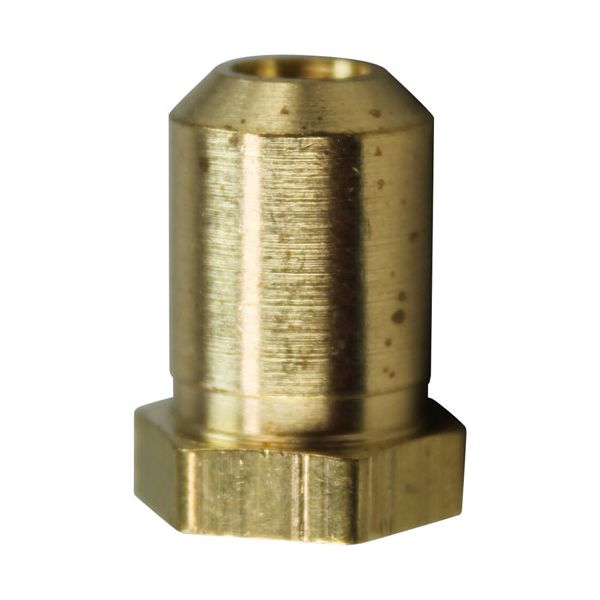
The Star Mfg E2-7757 Gas Fryer Orifice #51 regulates the supply of gas to the burner to enable the right quantity of fuel to reach the flame ensuring that the appliance burns consistently. It controls pressure and makes the burner start without any difficulties by forming a stream of gas. This part is made to fit directly into the burner assembly of the fryer, and it ensures that the gas delivery system is in line with the unit. It is small and can be placed safely in the appliance.

Dimensions

  • Length: 0.75 In
  • Width: 0.25 In
  • Height: 0.75 In
  • Weight: 0.01 lbs
https://partsfe.com/media/catalog/product/s/t/star-e2-7757-orifice-51-56997-2.jpg

Product Notes

  • Hood Orifice 3/8"-27 W/ #51 Hole
  • Star Fryer 216
ATOSA:
DYNAMIC COOKING SYSTEMS:
GLASS MAID:
LOLO COMMERCIAL FOODSERVICE EQUIPMENT:
159586
SOUTHBEND:
STAR MFG:
Write Your Own Review
You're reviewing:Star Mfg E2-7757 Gas Fryer Orifice #51
Your Rating
Customer Questions
What is the Best Electric Griddle?

Electric Griddle is an electronic equipment that uses an electric element as its heat source. It has a large cooking surface often made up of nonstick material. Electric Griddle has a surface which you do not find in the regular stovetop cookware. ...

What maintenance is required for the Star E2-7757 Orifice?

Inspect the orifice regularly for grease buildup, carbon deposits, or partial blockages. Clean carefully using approved non-abrasive tools to maintain steady gas flow. Proper maintenance ensures consistent flame performance and better burner operation. Always shut off gas supply before servicing.

What are common issues with the Star E2-7757 Orifice?

  • Clogging from grease or carbon buildup restricting gas flow.
  • Irregular or weak flame affecting heating consistency.
  • Partial blockage causing burner ignition problems.
  • Wear or deformation leading to inefficient combustion.
  • Gas flow inconsistency from debris accumulation.

We strive to provide our customers with a hassle-free and efficient shopping experience. Our shipping policy ensures the timely delivery of your orders and complete customer satisfaction. View More

We are committed to ensuring your complete satisfaction with every purchase. We understand that circumstances may arise where you must return a product or request a refund. If for any reason you are not satisfied, you may return the item(s) according to the terms outlined below. View More

This Payment Policy outlines the terms and conditions governing all payments made for products purchased through our website. By making a purchase, you agree to be bound by this Payment Policy. View More

Installation Steps

Step1: Turn off gas/electric supply and allow unit to cool.

Step2: Remove burner assembly carefully using correct tools ensure screws are stored safely.

Step3: Unscrew existing orifice and note orientation for replacement reference.

Step4: Install new orifice securely hand-tighten only.

Step5: Reassemble burner components tightly align seals properly.

Step6: Restore gas supply and check for leaks with soapy water avoid ignition during check.