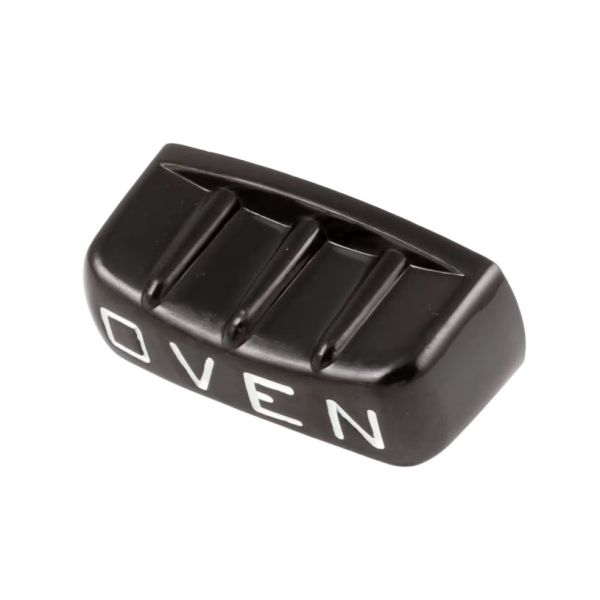
Garland 1089101 Oven Knob 2-1/8" DIA

Special Price $17.85 Regular Price $18.95
In stock
SKU
1089101
Oven Parts, Oven Knobs,
Manufacturer:
The Garland 1089101 Oven Knob is used to adjust the temperature settings of the appliance by turning it to the level of required heat and the intensity of cooking. It works by a simple twisting mechanism that activates, the internal control system of the oven to control the amount of heat produced. This knob is designed to be attached to the standard control shafts and is installed on the front panel of the oven, and is easily accessible for making temperature adjustments during cooking. Its 2-1/8" diameter provides a comfortable grip and the design fits into the layout of the control.

Dimensions

  • Length: 2.125 In
  • Width: 1 In
  • Height: 1 In
  • Weight: 0.1 lbs
https://partsfe.com/media/catalog/product/g/a/garland-1089101-oven-knob-2-1-8-d-oven-68536.jpg

Product Notes

  • Black Plastic Knob [ 2" X 1" ] ,Rectangle ["Oven"]
  • [Mount .240"] [Flat Down], Set Screw Down
  • Garland
  • Broiler Bc-66, Ir-67.
  • Oven 6-(40D,50D), 43-(40,43,50,53), 44-(40,43,50),
  • 45-(40,50), 55-43, 60-(40,43,50,53), 76-(40,50R),
  • 78-(40,50R).
  • Series: 40/50, G280(W/Fdo T'Stat), Gv280, H/P280.
Write Your Own Review
You're reviewing:Garland 1089101 Oven Knob 2-1/8" DIA
Your Rating
Customer Questions
Oven Knob

What is the use of knobs? Knobs are mechanical components that enable for the effective tightening and loosening of screws. With the use of knobs, you may regulate the oven's temperature. Do you already own an oven and your oven knobs giving ...

What maintenance is required for the Garland 1089101 Knob?

Clean the oven knob regularly with mild detergent to prevent grease buildup. Ensure it is securely fitted on the shaft and not cracked. Avoid excessive force during use to prevent stripping. Inspect periodically for wear and smooth operation.

What are common issues with the Garland 1089101 Knob?

  • Slipping on shaft due to worn coupling.
  • Cracking from heat exposure or impact.
  • Loose fit causing inaccurate temperature adjustment.
  • Difficulty turning due to internal wear or debris.
  • Knob detaching from stem during use.

We strive to provide our customers with a hassle-free and efficient shopping experience. Our shipping policy ensures the timely delivery of your orders and complete customer satisfaction. View More

We are committed to ensuring your complete satisfaction with every purchase. We understand that circumstances may arise where you must return a product or request a refund. If for any reason you are not satisfied, you may return the item(s) according to the terms outlined below. View More

This Payment Policy outlines the terms and conditions governing all payments made for products purchased through our website. By making a purchase, you agree to be bound by this Payment Policy. View More

Installation Steps

Step1: Turn off oven power or gas supply and ensure surface is cool before handling.

Step2: Remove old knob by pulling it straight off the control stem without force.

Step3: Align new knob opening with control shaft, matching flat edges if present.

Step4: Push knob firmly onto shaft until fully seated and stable.

Step5: Rotate knob to test smooth operation through all settings.

Step6: Check alignment of indicator markings with temperature or function scale.

Step7: Restore power or gas and verify safe operation of oven.