Robot Coupe 89397 Power Cord

Special Price $60.51 Regular Price $64.10
In stock
SKU
89397
Manufacturer:
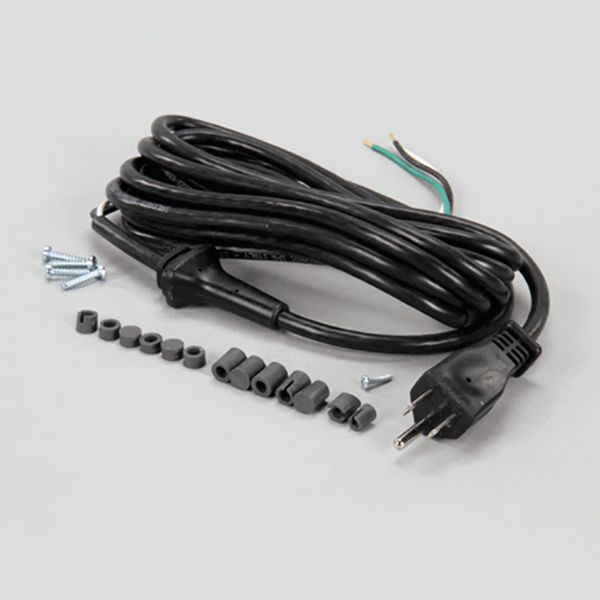
The Robot Coupe 89397 Power Cord is an electrical power supply that delivers to food preparation equipment using a standard outlet and conducts to internal components using insulated conductors. At one end, it is attached to the power terminals of the appliance, and at the other to the mains plug so that it can be started and then operated continuously during use. This is fitted on the back or the bottom of the machine, and it runs through the housing to the electrical compartment.

Dimensions

  • Length: 8.5 In
  • Width: 1.5 In
  • Height: 5.5 In
  • Weight: 0.85 lbs
https://partsfe.com/media/catalog/product/r/o/robot-coupe-89397-power-cord-83116-2.jpg

Product Notes

  • Power Cord, 120V, 3 Wire, No Lugs, 12 Ft.
  • Straight Molded 3 Prong Plug, Molded Cable Snap-In End.
  • Includes Handle Screw Kit 89532, 4 Screws, 4 Large Spacers,
  • 3 Small Spacers, Order # 28-2265.
  • Robot Coupe R2 (Old & New Style)
ROBOT COUPE:
29716, 39387, 89397, ROB89397
Write Your Own Review
You're reviewing:Robot Coupe 89397 Power Cord
Your Rating
Customer Questions
What maintenance is required for the Robot Coupe 89397 Power Cord?

Inspect the power cord regularly for cuts, fraying, or exposed wiring. Keep connectors clean and dry to ensure stable electrical contact. Avoid sharp bends or heavy pulling during use. Replace immediately if damage is detected to prevent electrical hazards.

What are common issues with the Robot Coupe 89397 Power Cord?

  • Loose connector or intermittent power loss.
  • Frayed insulation causing short circuits.
  • Overheating near plug due to heavy load.
  • Internal wire break from repeated bending.
  • Loose plug fit in receptacle.
  • Burnt smell from damaged insulation.

We strive to provide our customers with a hassle-free and efficient shopping experience. Our shipping policy ensures the timely delivery of your orders and complete customer satisfaction. View More

We are committed to ensuring your complete satisfaction with every purchase. We understand that circumstances may arise where you must return a product or request a refund. If for any reason you are not satisfied, you may return the item(s) according to the terms outlined below. View More

This Payment Policy outlines the terms and conditions governing all payments made for products purchased through our website. By making a purchase, you agree to be bound by this Payment Policy. View More

Installation Steps

Step1: Unplug the unit from mains power and ensure it is fully powered off.

Step2: Remove rear or base access panel using appropriate screwdriver.

Step3: Disconnect the old power cord terminals carefully.

Step4: Connect the new power cord to matching terminals.

Step5: Secure strain relief and tighten all fasteners.

Step6: Reassemble panel and test operation.