Pitco PT60152001 Fryer Ignition Control Module 24V 50/60HZ 90 Second Lockout

Special Price $114.22 Regular Price $220.00
In stock
SKU
PT60152001
Manufacturer:
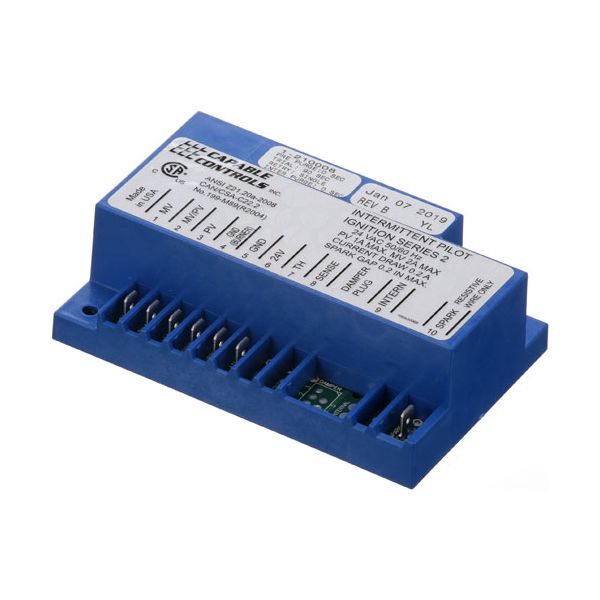
The Pitco PT60152001 Fryer Ignition Control Module is an essential part which guarantees correct ignition. This is a 24V, 50/60Hz module that has a lockout time of 90 seconds; in the event of failed ignition, the gas flow is locked off as a safety measure. The main advantage is stability and, therefore, less time spent on equipment failure in a professional kitchen. This module is very convenient, it does not require complicated setup, and is compatible with most models, which makes it perfect for fryer management and taste consistency.

Dimensions

  • Length: 5 In
  • Width: 3.25 In
  • Height: 1.5 In
  • Weight: 0.4 lbs
https://partsfe.com/media/catalog/product/p/i/pitco-pt60152001-fryer-ignition-control-module-24v-50-60hz-90-second-lockout-89990.jpg

Product Notes

  • Ignition Control Module, 24V, 50/60Hz, 90 Second Lockout,
  • 4-7/8" X 3-1/8" White Box, W/ Pilot Light
  • Pitco Fryer Sgh50
  • Pitco Now Uses A White Colored Spark Module.
  • Mounting Holes Different. Will Need To Drill New Hole(S).
  • New Style 24Vac, 4-7/8" X 3-1/8", W/Pilot Light.
  • Same Terminals As Old Box,
  • New Style White Box Pitco # 60152001
  • Old Style Gray Box Pitco #60108601
  • 24V, 5-1/4" X 3-1/4" Grey Box
Write Your Own Review
You're reviewing:Pitco PT60152001 Fryer Ignition Control Module 24V 50/60HZ 90 Second Lockout
Your Rating
Customer Questions
What maintenance is required for the Pitco PT60152001 Ignition Control Module?

Inspect the module for proper function and keep it free from grease or moisture. Check wiring connections regularly. Proper care supports accurate ignition control and secure fryer operation.

What are common issues with the Pitco PT60152001 Ignition Control Module?

  • Ignition failure during startup.
  • Delayed ignition response affecting operation.
  • Electrical faults disrupting control signals.
  • Inconsistent burner activation.
  • Moisture damage affecting circuitry.
  • Loose connections causing malfunction.
  • Reduced ignition accuracy over time.

We strive to provide our customers with a hassle-free and efficient shopping experience. Our shipping policy ensures the timely delivery of your orders and complete customer satisfaction. View More

We are committed to ensuring your complete satisfaction with every purchase. We understand that circumstances may arise where you must return a product or request a refund. If for any reason you are not satisfied, you may return the item(s) according to the terms outlined below. View More

This Payment Policy outlines the terms and conditions governing all payments made for products purchased through our website. By making a purchase, you agree to be bound by this Payment Policy. View More

Installation Steps

Step1: Turn off both gas and electrical supply to ensure safe installation.

Step2: Open the fryer control compartment to access the ignition module.

Step3: Label and carefully disconnect all wiring from the old module.

Step4: Install the new ignition module in the same position.

Step5: Reconnect all wires securely according to the original configuration.

Step6: Restore gas and power, then test ignition to ensure proper startup.