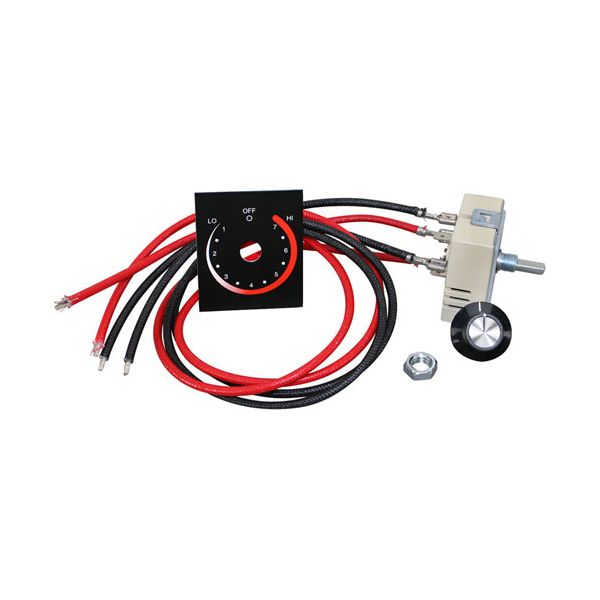
Hatco R02-19-019-00 Infinite Control Kit 240V 13 AMP

Special Price $63.70 Regular Price $65.00
In stock
SKU
R02-19-019-00
Oven Parts, Ignitors,
Manufacturer:
Hatco R02-19-019-00 Infinite Control Kit is designed to provide precise temperature adjustments for various types of warmers ensuring optimal performance in food service applications. Users can precisely adjust settings for food warming through the combination of a pointer dial and aluminum label in this innovative kit which prevents both overheating and drying out of food. The kit functions at 240V and 13 AMP while providing dependable operation in challenging conditions. The control kit stands out through its sturdy build which combines black and red 20" wires with a hex locknut for safe installation across GR, GRA, GRAH, GRBW, and GRH series models.

Dimensions

  • Length: 8 In
  • Width: 5.25 In
  • Height: 2.3 In
  • Weight: 0.7 lbs
https://partsfe.com/media/catalog/product/h/a/hatco-r02-19-019-00-infinite-control-kit-240v-13-amp-92606.jpg

Product Notes

  • 240V, 13 Amp, Infinite Control Kit,
  • Pointer Dial, Aluminum Label, Black & Red 20" Wires,
  • Hex Locknut, D Stem Flat Down
  • Pointer Dial Only A2172, # 221178
  • Hatco
  • Warmer Series: Gr, Gra, Grah, Grbw,
  • Grh. Fdw
Write Your Own Review
You're reviewing:Hatco R02-19-019-00 Infinite Control Kit 240V 13 AMP
Your Rating
Customer Questions
What maintenance is required for the Hatco R02-19-019-00 Infinite Control Kit?

Keep the control housing free from grease and dust to prevent interference with operation. Periodically check wiring connections for tightness and signs of heat stress. Regular inspection ensures smooth power adjustment and reduces the risk of control failure during high-demand use.

What are common issues with the Hatco R02-19-019-00 Infinite Control Kit?

  • Loss of consistent heat regulation during operation.
  • Control knob sticking or failing to adjust smoothly.
  • Intermittent power delivery to heating element.
  • Electrical contact wear causing unstable performance.
  • Overheating inside the control assembly.

We strive to provide our customers with a hassle-free and efficient shopping experience. Our shipping policy ensures the timely delivery of your orders and complete customer satisfaction. View More

We are committed to ensuring your complete satisfaction with every purchase. We understand that circumstances may arise where you must return a product or request a refund. If for any reason you are not satisfied, you may return the item(s) according to the terms outlined below. View More

This Payment Policy outlines the terms and conditions governing all payments made for products purchased through our website. By making a purchase, you agree to be bound by this Payment Policy. View More

Installation Steps

Step1: Disconnect power to the equipment and verify the circuit is de-energized before servicing.

Step2: Remove the access panel and locate the existing infinite control assembly.

Step3: Label all wire connections to ensure proper reinstallation.

Step4: Disconnect the wiring and remove the mounting hardware securing the old control.

Step5: Install the new infinite control kit, secure it in place, and reconnect the wires to the correct terminals.

Step6: Reinstall the access panel, restore power, and test the heating element through its control range to verify proper operation.