
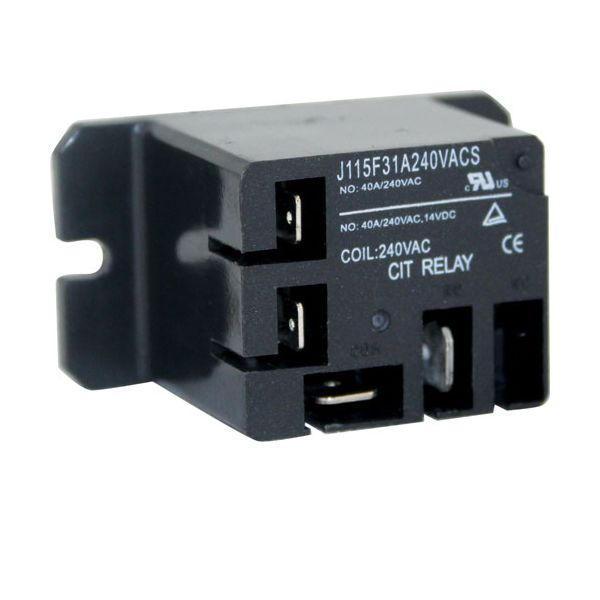
APW 1475020 Thermostat Relay

Special Price $19.07 Regular Price $37.73
In stock
SKU
1475020
Manufacturer:

The APW 1475020 Thermostat Relay operates under the concept of observing the temperature changes with the support of a sensor to activate an internal switching mechanism. This part is installed in the internal control housing of commercial kitchen appliance units to stabilize the condition. The unit has standard spade terminals to connect it with wiring and a small frame that is suitable for high-heat conditions. It provides uniformity in running industrial kitchen equipment as the main logic gate to temperature-sensitive cycles.

Dimensions

  • Length: 2 In
  • Width: 1.5 In
  • Height: 1.5 In
  • Weight: 0.07 lbs
https://partsfe.com/media/catalog/product/a/p/apw-1475020-relay-w-4-term-240vac-coil-58494-2.jpg

Product Notes

  • Relay, 240Vac Coil, (4) Term, N/O
  • Star Wells Fryer F49
APW WYOTT:
BLOOMFIELD:
Write Your Own Review
You're reviewing:APW 1475020 Thermostat Relay
Your Rating
Customer Questions
What maintenance is required for the APW 1475020 Relay?

Regularly inspect the relay terminals for signs of carbon buildup or corrosion to ensure stable electrical conductivity. Verify that all four terminal connections remain tight to prevent arcing and overheating during operation. Always disconnect the power source before performing inspections to ensure technician safety.

What are common issues with the APW 1475020 Relay?

  • Pitting or welding of internal contact points.
  • Coil failure resulting in a failure to switch.
  • Audible humming or buzzing due to mechanical vibration.
  • Intermittent electrical continuity caused by burnt terminal surfaces.

We strive to provide our customers with a hassle-free and efficient shopping experience. Our shipping policy ensures the timely delivery of your orders and complete customer satisfaction. View More

We are committed to ensuring your complete satisfaction with every purchase. We understand that circumstances may arise where you must return a product or request a refund. If for any reason you are not satisfied, you may return the item(s) according to the terms outlined below. View More

This Payment Policy outlines the terms and conditions governing all payments made for products purchased through our website. By making a purchase, you agree to be bound by this Payment Policy. View More

Installation Steps

Step1: Disconnect power supply and check zero voltage before handling electrical components.

Step2: Remove access panel to locate the existing old relay and note wiring positions.

Step3: Disconnect the four terminal connections, labeling wires for correct reinstallation.

Step4: Mount the new relay securely and reconnect terminals to matching points.

Step5: Restore power, test control circuit operation, and ensure relay connects smoothly without overheating or arcing.