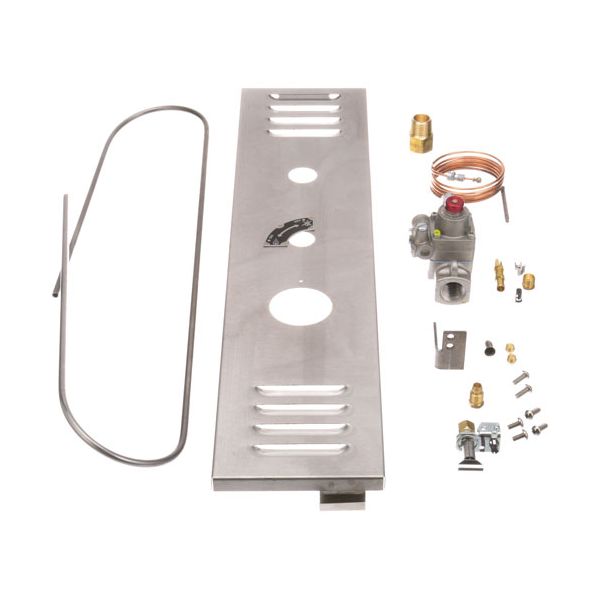
Designed as an integral part of commercial gas oven safety systems, this retrofit kit is used to upgrade and restore proper ignition and flame monitoring functions in compatible oven units. It includes essential components such as a TS11K safety valve, 48-inch thermocouple, pilot assembly, pilot tubing, mounting bracket, LP pilot orifice, control panel, and a 1/2" x 1/2" brass extension, all working together to regulate gas flow and maintain safe burner operation. The thermocouple detects flame presence and signals the safety valve to allow or shut off gas accordingly, while the pilot assembly ensures reliable ignition performance. Commonly installed in commercial kitchens using gas ovens, this kit supports consistent heating and controlled gas delivery across cooking cycles. When existing safety components become worn or unreliable, issues such as pilot outages, delayed ignition, or unsafe gas flow can occur. Replacing or upgrading with this complete retrofit kit helps restore stable operation, improves ignition reliability, and ensures proper safety control within the oven system, making it essential for maintaining safe and efficient cooking performance.
Equipment Compatibility:
Common retrofit and safety upgrade applications for the Blodgett Oven Safety Retrofit Kit include commercial gas ovens used in restaurants, bakeries, and foodservice operations. This Oven Safety Retrofit Kit 52302 is compatible with commercial equipment from leading brands such as Blodgett, and more, where controlled gas flow, reliable ignition, and flame safety monitoring are required for proper equipment operation.
Brand Compatibility:
This retrofit kit replaces multiple part numbers used across compatible equipment models from brands such as Blodgett and more. Complete cross-reference details are provided separately for identification and ordering purposes.
Product Specifications:
Product Type: Oven Safety Retrofit Kit
Manufacturer: Blodgett
SKU: 52302
Panel Dimensions: 22-1/2" L x 5" W
Thermocouple Length: 48 inches
Connection Size: 1/2" x 1/2" brass extension
Components Included: Safety valve, pilot assembly, pilot tubing, mounting bracket, control panel, LP pilot orifice
Key Features:
- Integrates multiple safety and ignition components into a single retrofit solution
- 48" thermocouple enables accurate flame sensing and gas control response
- Supports stable ignition performance and consistent oven heating operation
- Helps restore safe gas flow regulation in worn or outdated oven systems
- Includes pilot assembly and tubing for complete ignition system replacement
- Designed for straightforward installation in compatible commercial oven units
“After installing this kit, the pilot lights consistently and stay stable. The oven runs much more reliably now without the usual ignition issues.”