Bakers Pride S3009X Oven Door Pin 9/16" Od X 3" W/ Nut & Spacer

$42.64
In stock
SKU
S3009X
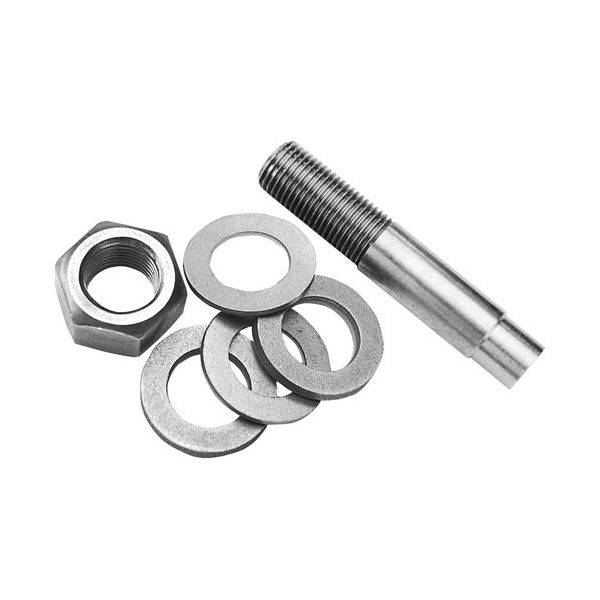
The Bakers Pride S3009X Oven Door Pin Assembly is used by fitting to the hinge of the appliance that works as a pivot where the door is able to swing in and out. The pin fits into the hinge slots, keeping the door and the oven frame in line and controlling movement. It is usually placed on the side hinges of the oven joining the door to the main body so that it can be used effectively. The assembly is 9/16" by 3" and connects to the existing hinge system.

Dimensions

  • Length: 3 In
  • Width: 1 In
  • Height: 1 In
  • Weight: 0.3 lbs
https://partsfe.com/media/catalog/product/b/a/bakers-pride-s3009x-oven-door-pin-9-16-od-x-3-w-nut-spacer-65913.jpg

Product Notes

  • Door Pin 9/16" Od X 3" W/ Nut & Spacer, Washers 4 Total ,2
  • Thick 2 Thin
  • Bakers Pride Oven 101, 151, 201, 251, 301, 401, Ds805, D125,
  • ( Y600 Right Side )
Write Your Own Review
You're reviewing:Bakers Pride S3009X Oven Door Pin 9/16" Od X 3" W/ Nut & Spacer
Your Rating
Customer Questions
What maintenance is required for the Bakers Pride S3009X Door Pin?

Regularly inspect the door pin for signs of wear, rust, or loosening. Keep the pin and surrounding components clean from grease and debris buildup. Ensure the nut and spacer are securely fastened. Always handle only when the oven is cool to avoid injury.

What are common issues with the Bakers Pride S3009X Door Pin?

  • Loose or missing nut and spacer.
  • Worn or bent door pin affecting alignment.
  • Difficulty in opening or closing the oven door.
  • Door sagging due to improper pin support.

We strive to provide our customers with a hassle-free and efficient shopping experience. Our shipping policy ensures the timely delivery of your orders and complete customer satisfaction. View More

We are committed to ensuring your complete satisfaction with every purchase. We understand that circumstances may arise where you must return a product or request a refund. If for any reason you are not satisfied, you may return the item(s) according to the terms outlined below. View More

This Payment Policy outlines the terms and conditions governing all payments made for products purchased through our website. By making a purchase, you agree to be bound by this Payment Policy. View More

Installation Steps

Step1: Ensure the oven is off and cooled completely.

Step2: Access the door hinge or mounting area.

Step3: Remove the worn pin along with nut and spacer.

Step4: Insert the new pin through the hinge assembly.

Step5: Secure it with the provided nut and spacer.

Step6: Test the door for smooth opening and closing.