Hobart 00-289121 Float Switch and Probe Assembly Low Water

Special Price $255.45 Regular Price $407.42
In stock
SKU
00-289121
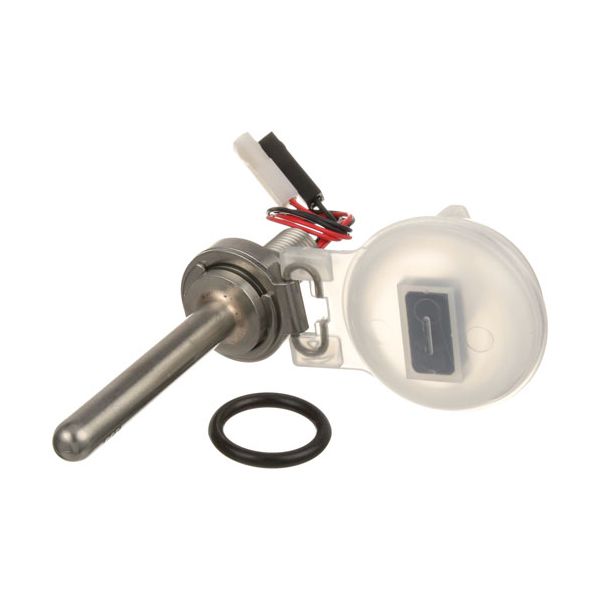
The Hobart 00-289121 Float Switch and Probe Assembly Low Water is a system used to check and regulate the amount of water in a commercial dishwasher to avoid malfunction in the case of low water supply. It operates on a float system and probe sensors that are easy to the presence of water and transmit the signals to the control system to ensure the proper water levels. This is usually fitted within the wash tank or reservoir space of the unit where it directly connects with the water supply and control elements. As a component of the internal system of the machine, it provide the appropriate communication between the control circuitry.

Dimensions

  • Length: 4.5 In
  • Width: 2 In
  • Height: 1.5 In
  • Weight: 2.55 lbs
https://partsfe.com/media/catalog/product/h/o/hobart-00-289121-dishwasher-sensor-with-float-41531-2.jpg

Product Notes

  • Sensor W/ Float, With O-Ring
  • Float Only # 282324
  • O-Ring = 321530
  • Hobart Dishwasher Am14,Am14C,Am14F,Am14P,Am14T,Am14Tc
HOBART:
00-186091, 00-289121, 186091, 289121, HOB00-186091, HOB186091, HOB289121
Write Your Own Review
You're reviewing:Hobart 00-289121 Float Switch and Probe Assembly Low Water
Your Rating
Customer Questions
What maintenance is required for the Hobart 00-289121 Float Switch and Probe Assembly?

Regularly inspect the float and probe for buildup, corrosion, or physical damage. Ensure the float moves freely and the probe is properly positioned. Check electrical connections for tightness and test the assembly to confirm accurate low-water detection.

What are the common issues with the Hobart 00-289121 Float Switch and Probe Assembly?

  • False low-water alarms
  • Probe sticking due to mineral buildup
  • Electrical connection failures
  • Intermittent or unresponsive switch activation.

What are common issues with the Hobart 00-289121 Float Switch and Probe Assembly?

  • Float sticking or not moving freely.
  • Probe misalignment affecting detection.
  • Low-water signal failing to trigger.
  • Incorrect water level reading.

We strive to provide our customers with a hassle-free and efficient shopping experience. Our shipping policy ensures the timely delivery of your orders and complete customer satisfaction. View More

We are committed to ensuring your complete satisfaction with every purchase. We understand that circumstances may arise where you must return a product or request a refund. If for any reason you are not satisfied, you may return the item(s) according to the terms outlined below. View More

This Payment Policy outlines the terms and conditions governing all payments made for products purchased through our website. By making a purchase, you agree to be bound by this Payment Policy. View More

Installation Steps

Step1: Disconnect power and water supply before servicing.

Step2: Remove the tank panel to access the old float switch.

Step3: Disconnect wiring and carefully remove the old probe assembly.

Step4: Install the new float switch and probe in the same position.

Step5: Reconnect wiring securely and ensure proper alignment.

Step6: Restore power and water, then test for correct low-water detection.